Archive for handmade3d

The Making of a Tardis


Tardis
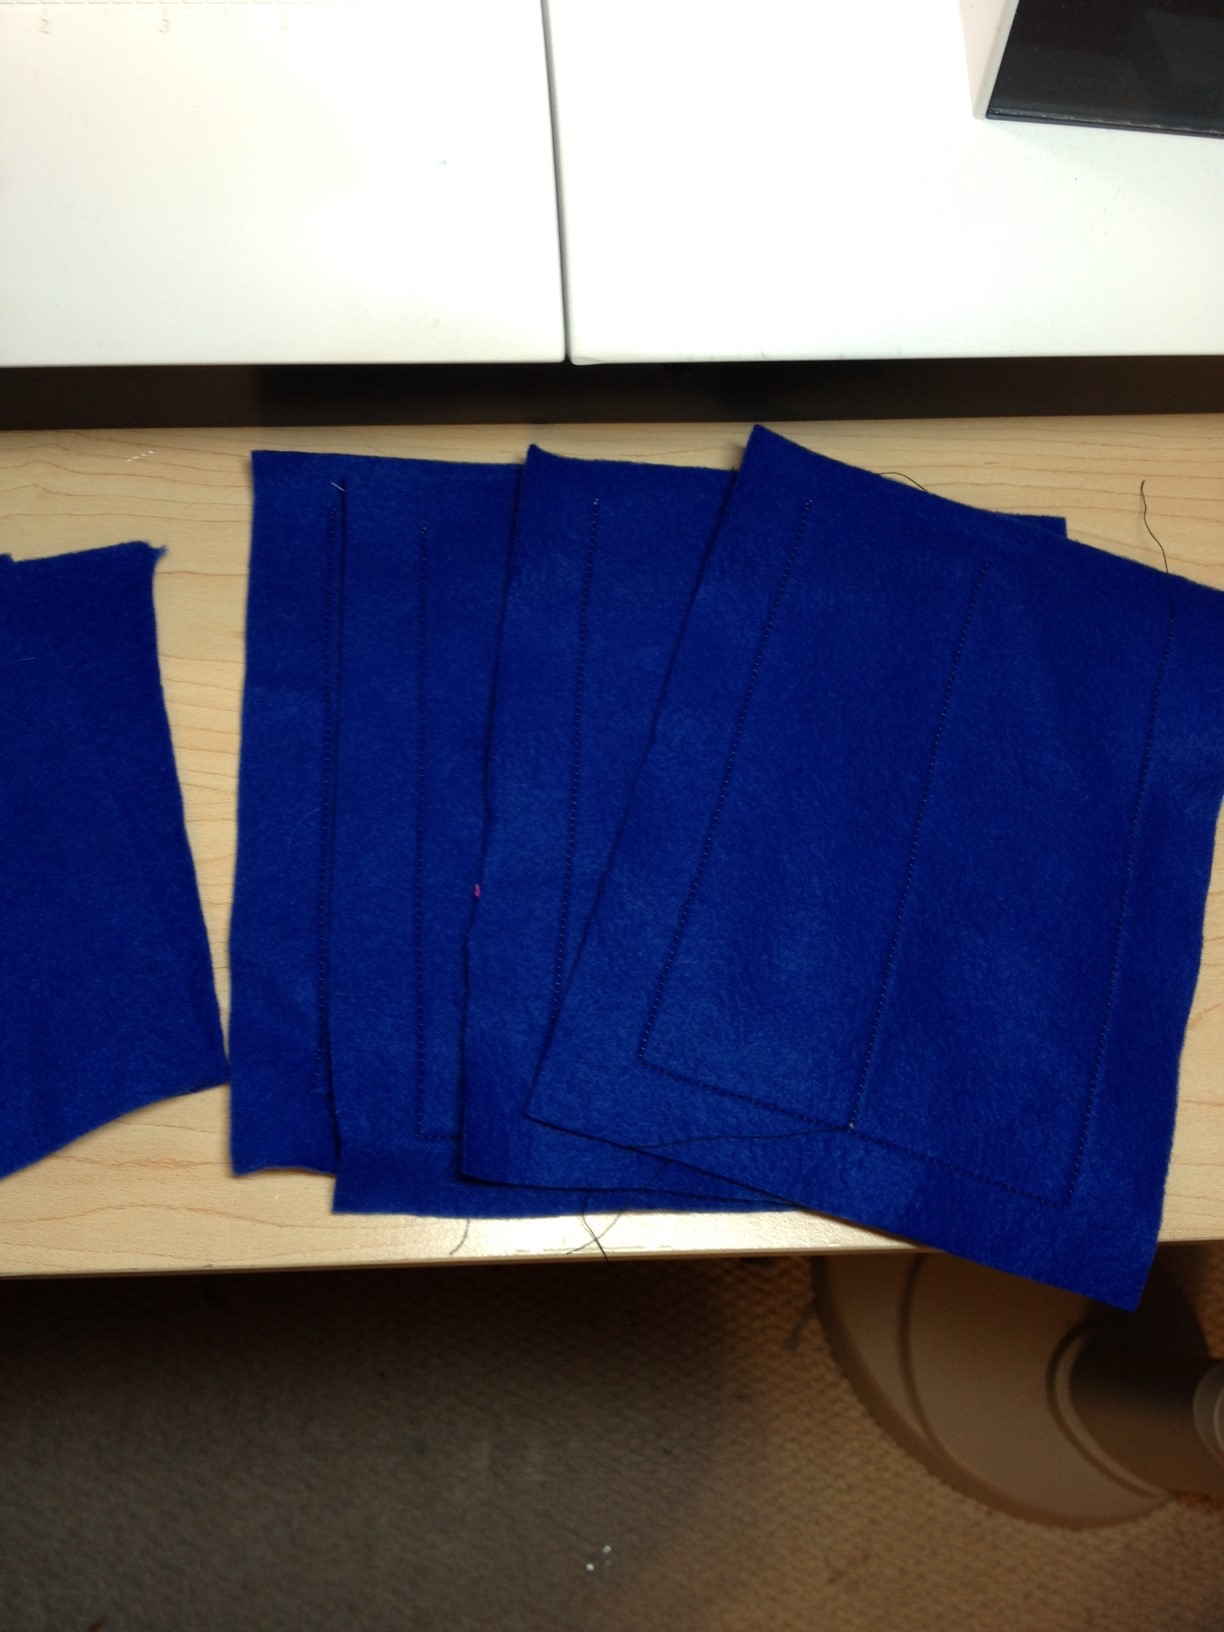
Often people wonder how I make what I do, so welcome to “The Making of a Tardis!” First I start with the wonderful Tardis blue fabric and cut 6 panels for each Tardis.  The Tardis is basically a box, so hence it needs six sides.Once they are cut I first stitch the side door panels with straight lines to define the door frames.

image_A

Well, wait. I’m out order. While I am cutting the panels, I actually have my embroidery machine working.  I created the Police Box top panel in my embroidery software and then set my machine to stitch out 10 pieces at a time.  10 may sound like a lot but it only makes two and half. Remember the four sides of a box?  Each side needs the police sign on top.

Ok, so once the door frames are stitched, I cut out and clean up all the embroidery pieces. I then stitch them to the top of the door frame.
image_B

Once the top panels are stitched on, its time for the windows.  I usually cut these out when I’m cutting the panels.  Each door needs two windows, so that’s eight tiny squares per Tardis.  They are about 1 1/2″.  First I do a straight line across and up down for the panes.  Then zig zag stitch around them to keep the windows on.
image_C

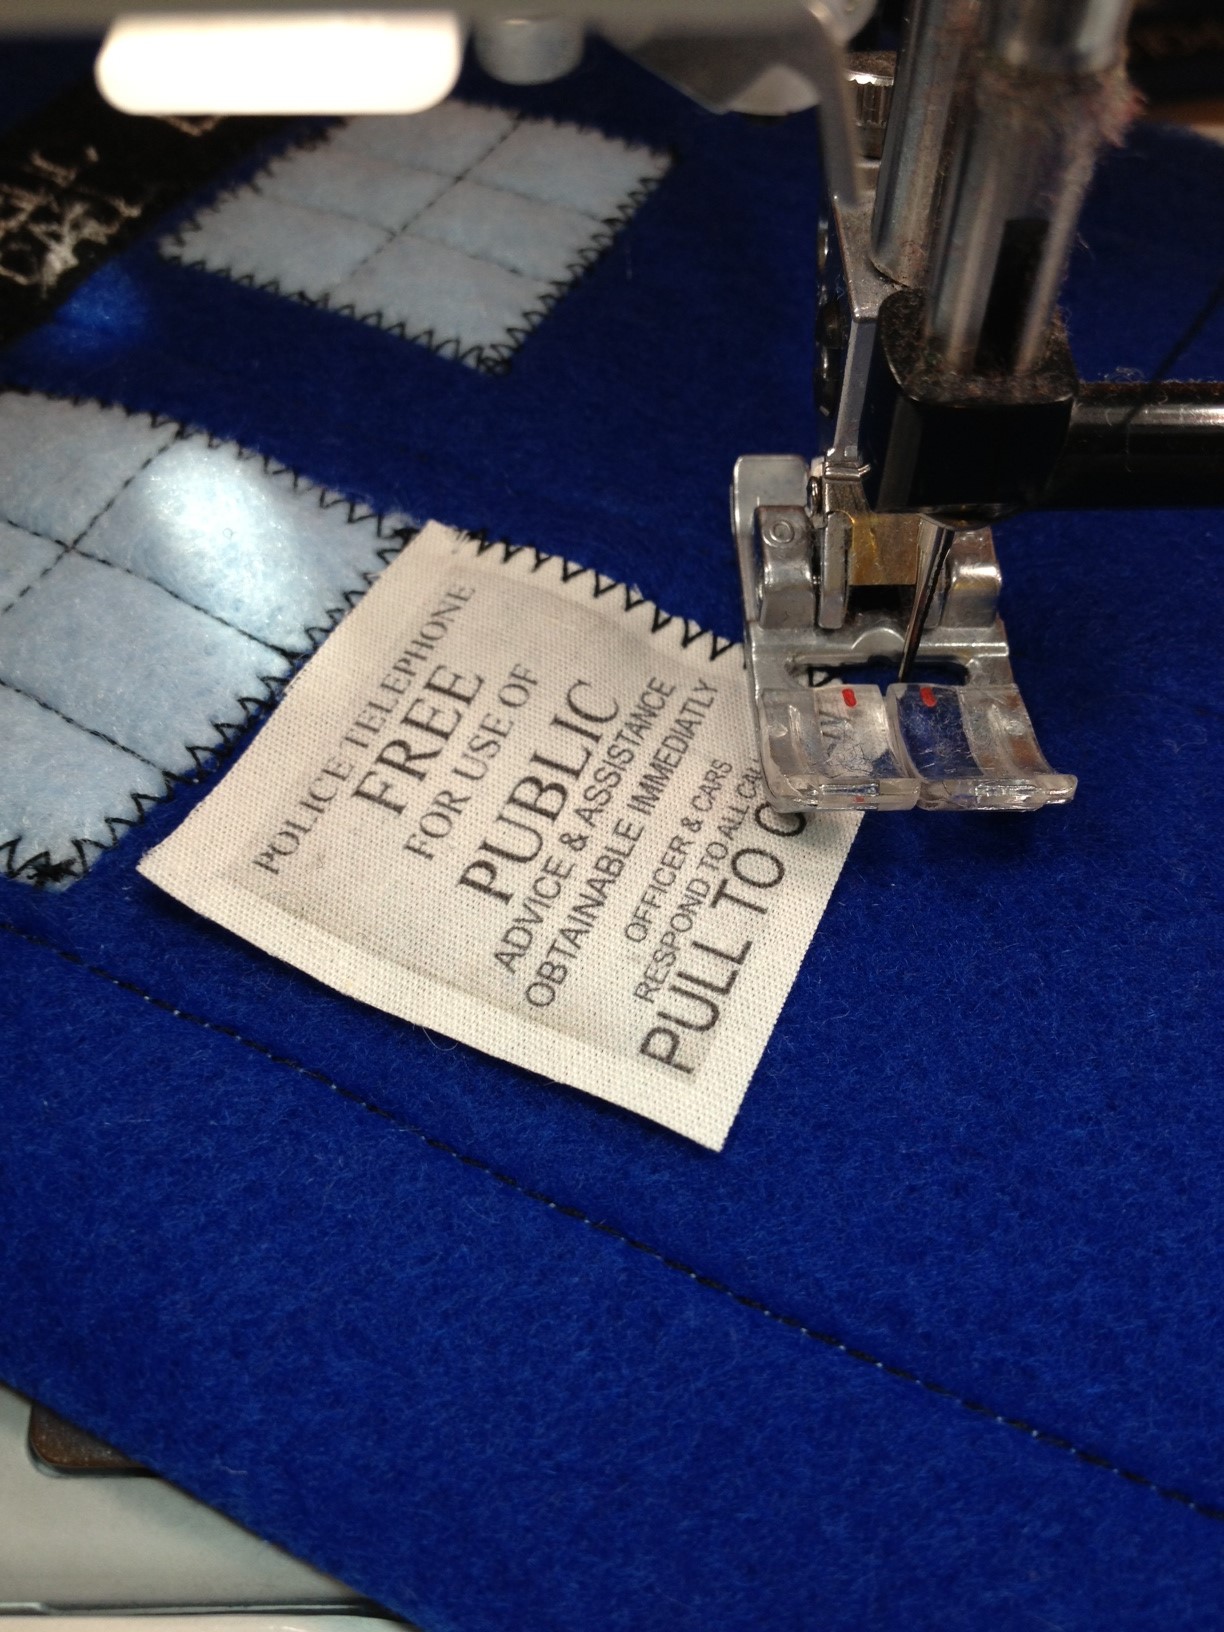
After the windows, it’s time for the Free Call Sign.  This I have already made as well.  I made the design in Photoshop, after finding a picture of the Tardis online to read the text.  I then print the design onto special fabric that goes through my printer. This fabric has to dry for ten minutes and then gets set with an iron so the ink will not bleed.  Ok, time to stitch them on!  Luckily there is only one per Tardis, as that fabric is expensive. 
image_D


Ok.  Once the windows and Call sign are done, its time for the rest of the doors.I have to do it by eye, but I stitch on the rest of the door panels.  Those Tardis doors are not flat you know!
image_E

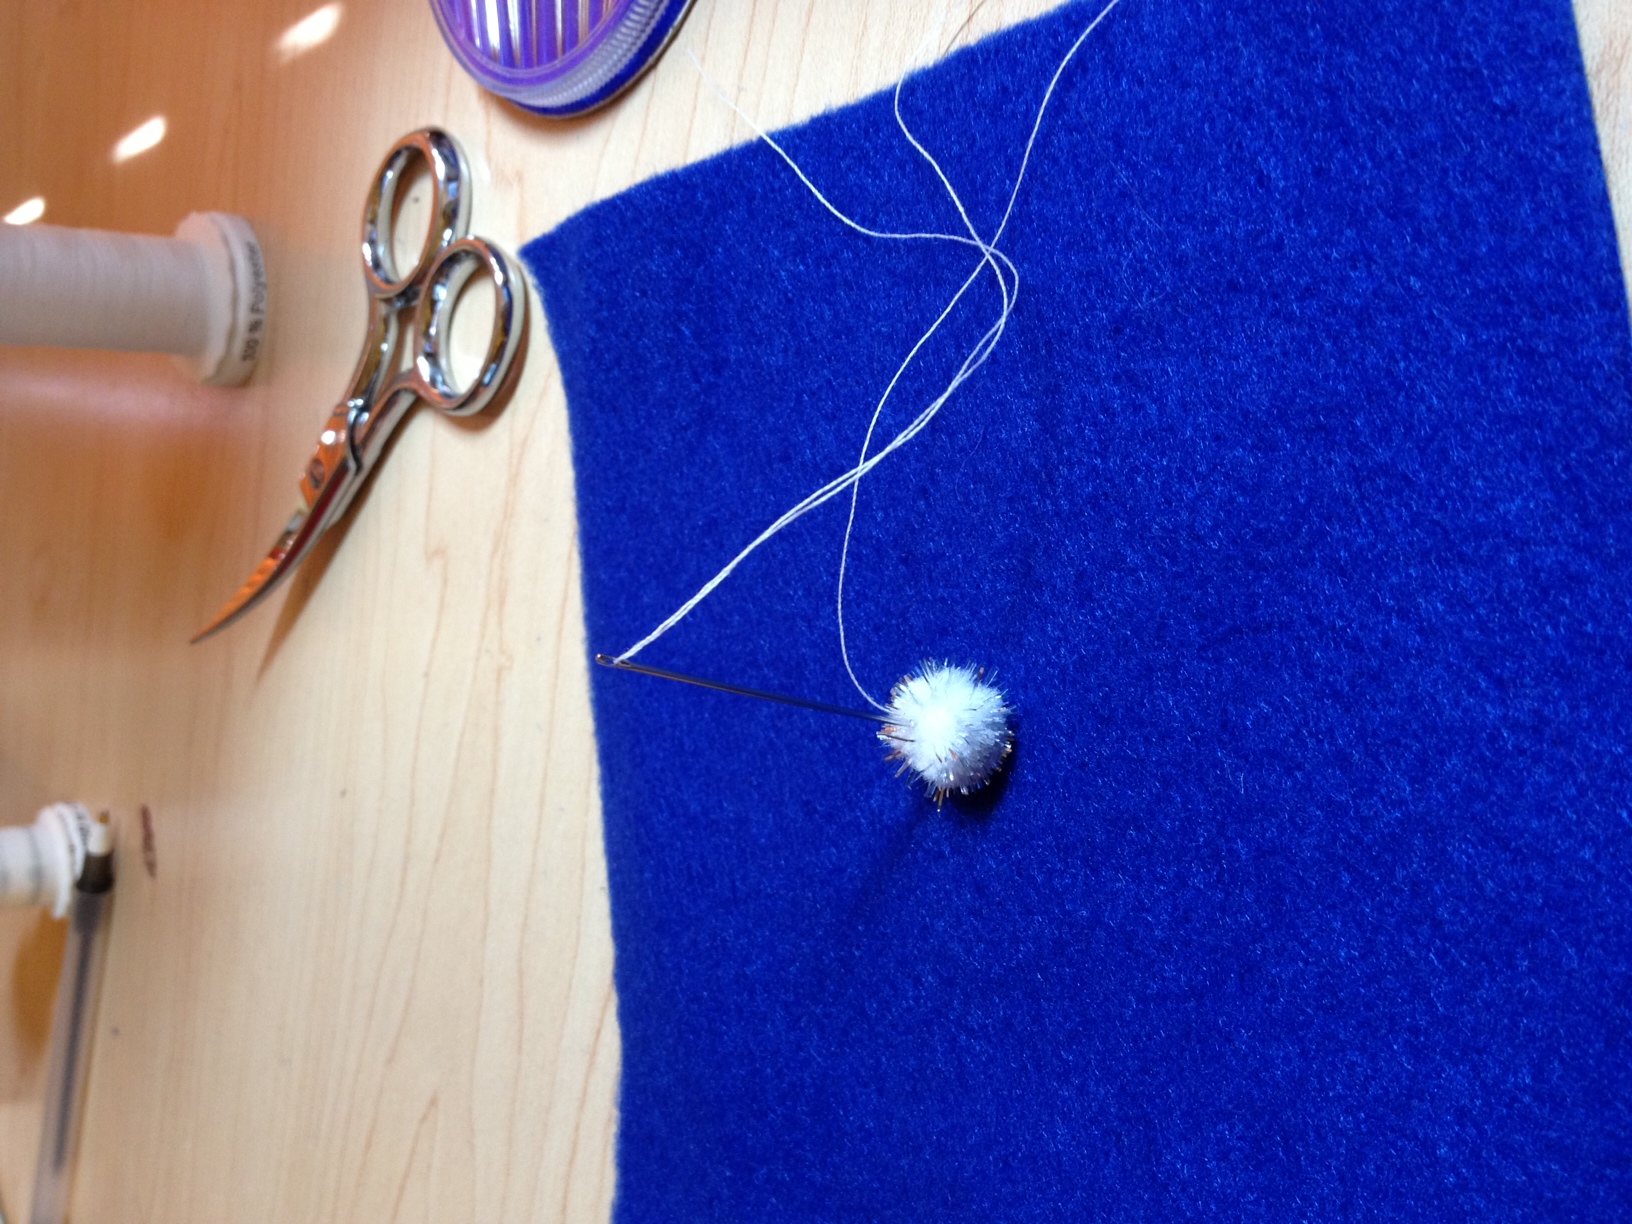
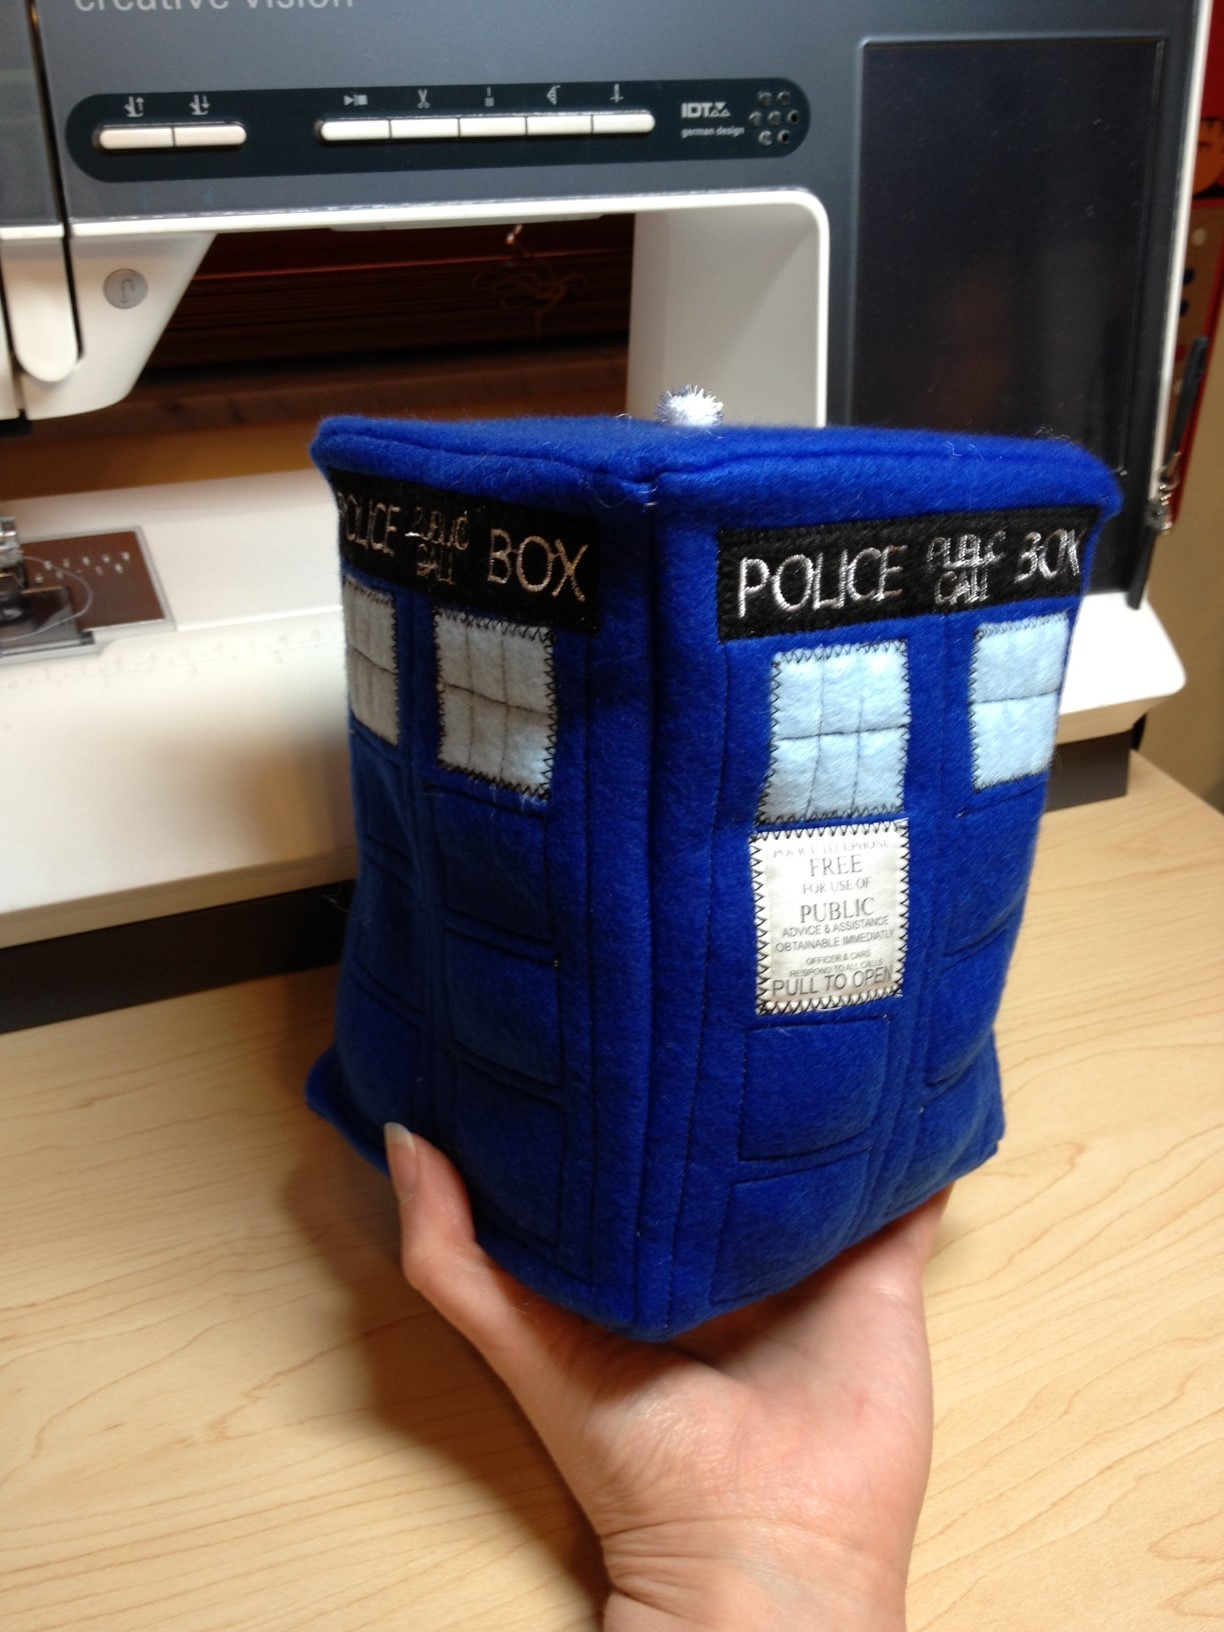
Now for a little handwork.  Each Tardis needs a light bulb on top. I use sparkly mini pom poms.
image_F


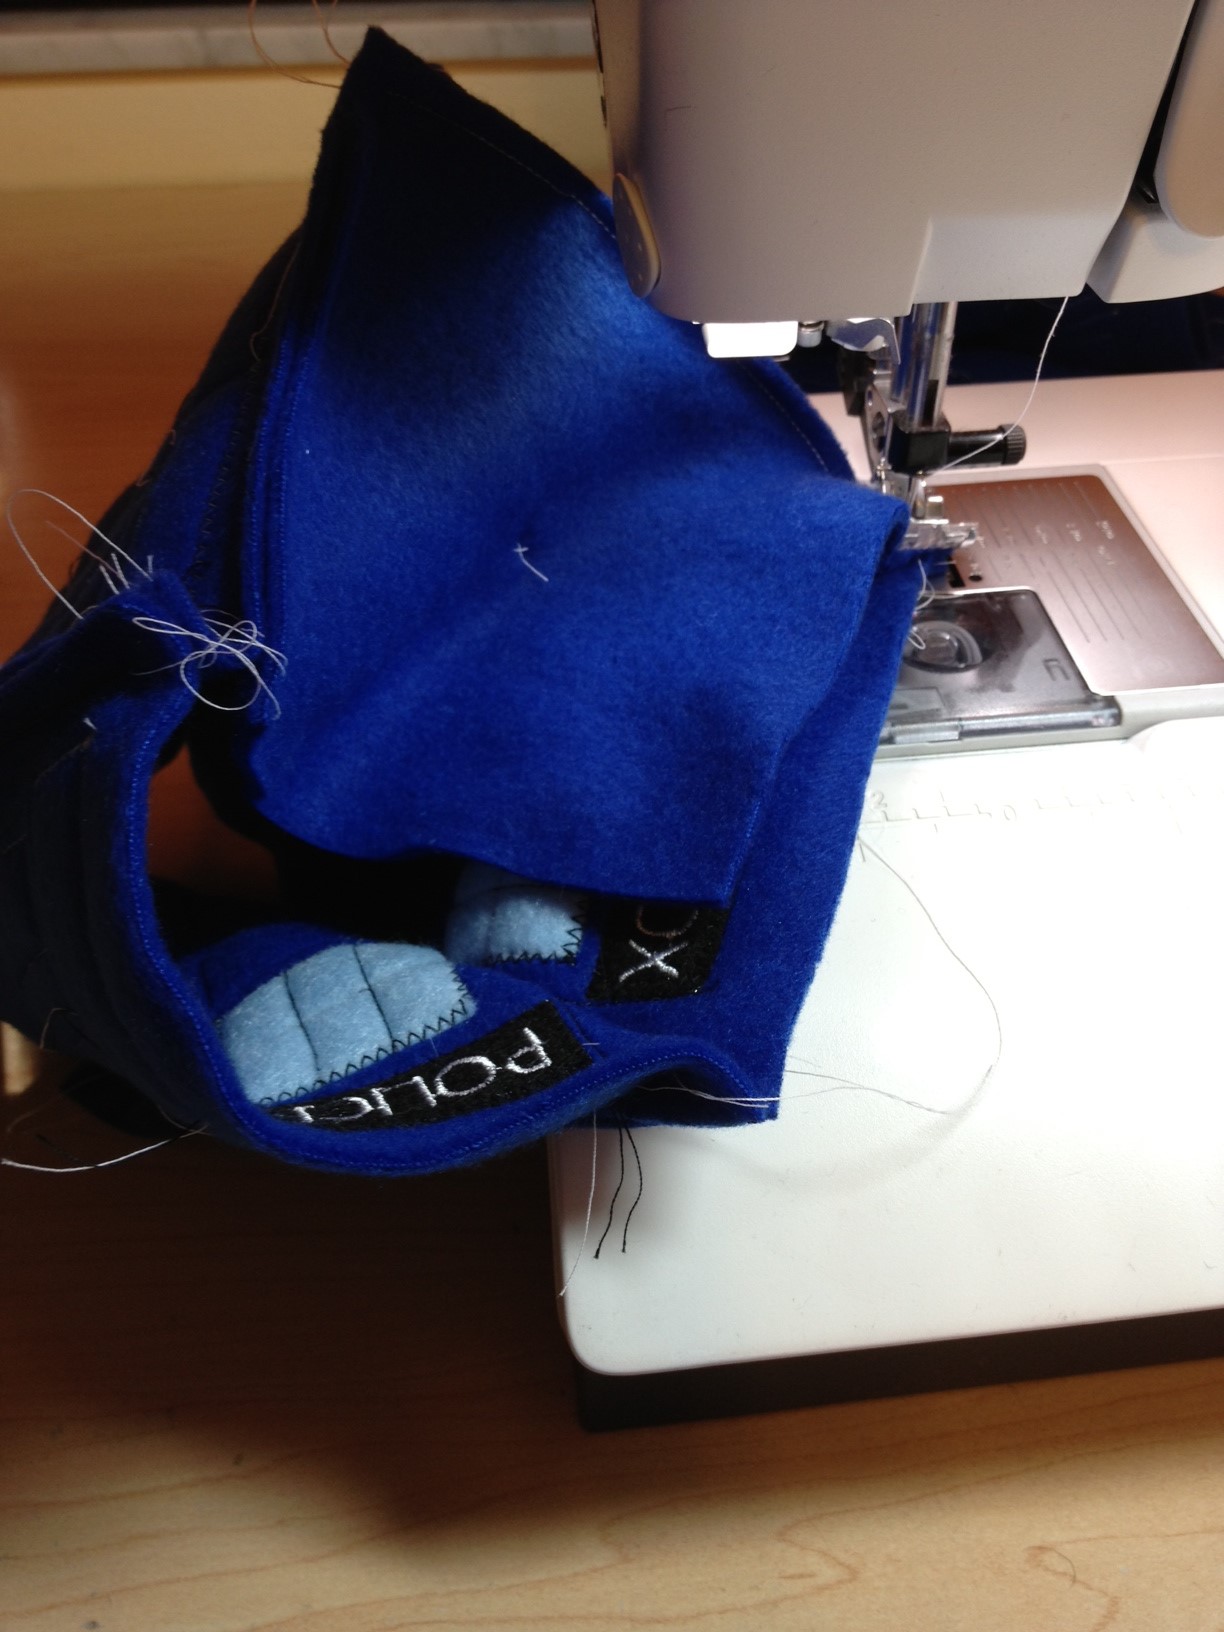
Ok, the most time consuming parts are over. Smooth sailing from here!  I first sew together the four walls, inside out of course to hide the seams.
image_G

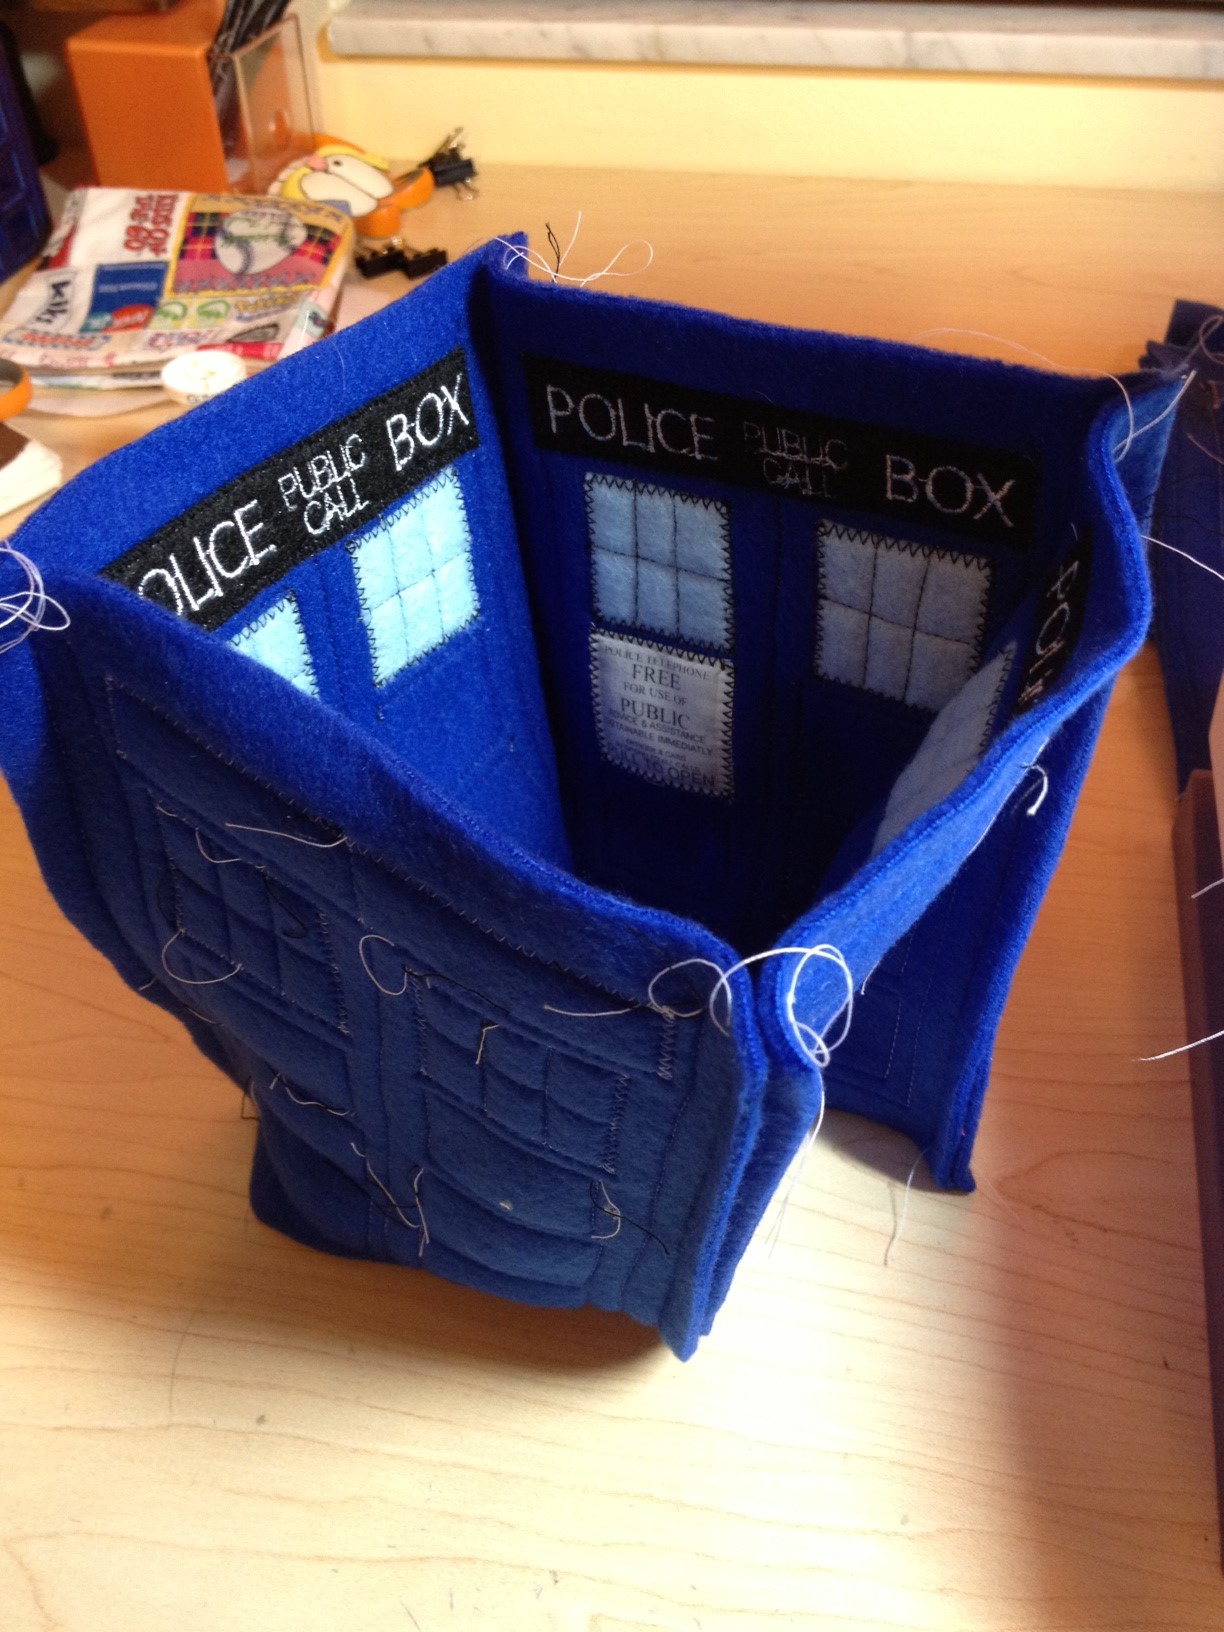
Then I sew on the top and the bottom pieces.  The top gets completely sewn down.  The bottom I leave one side open so I can flip inside out.
image_H

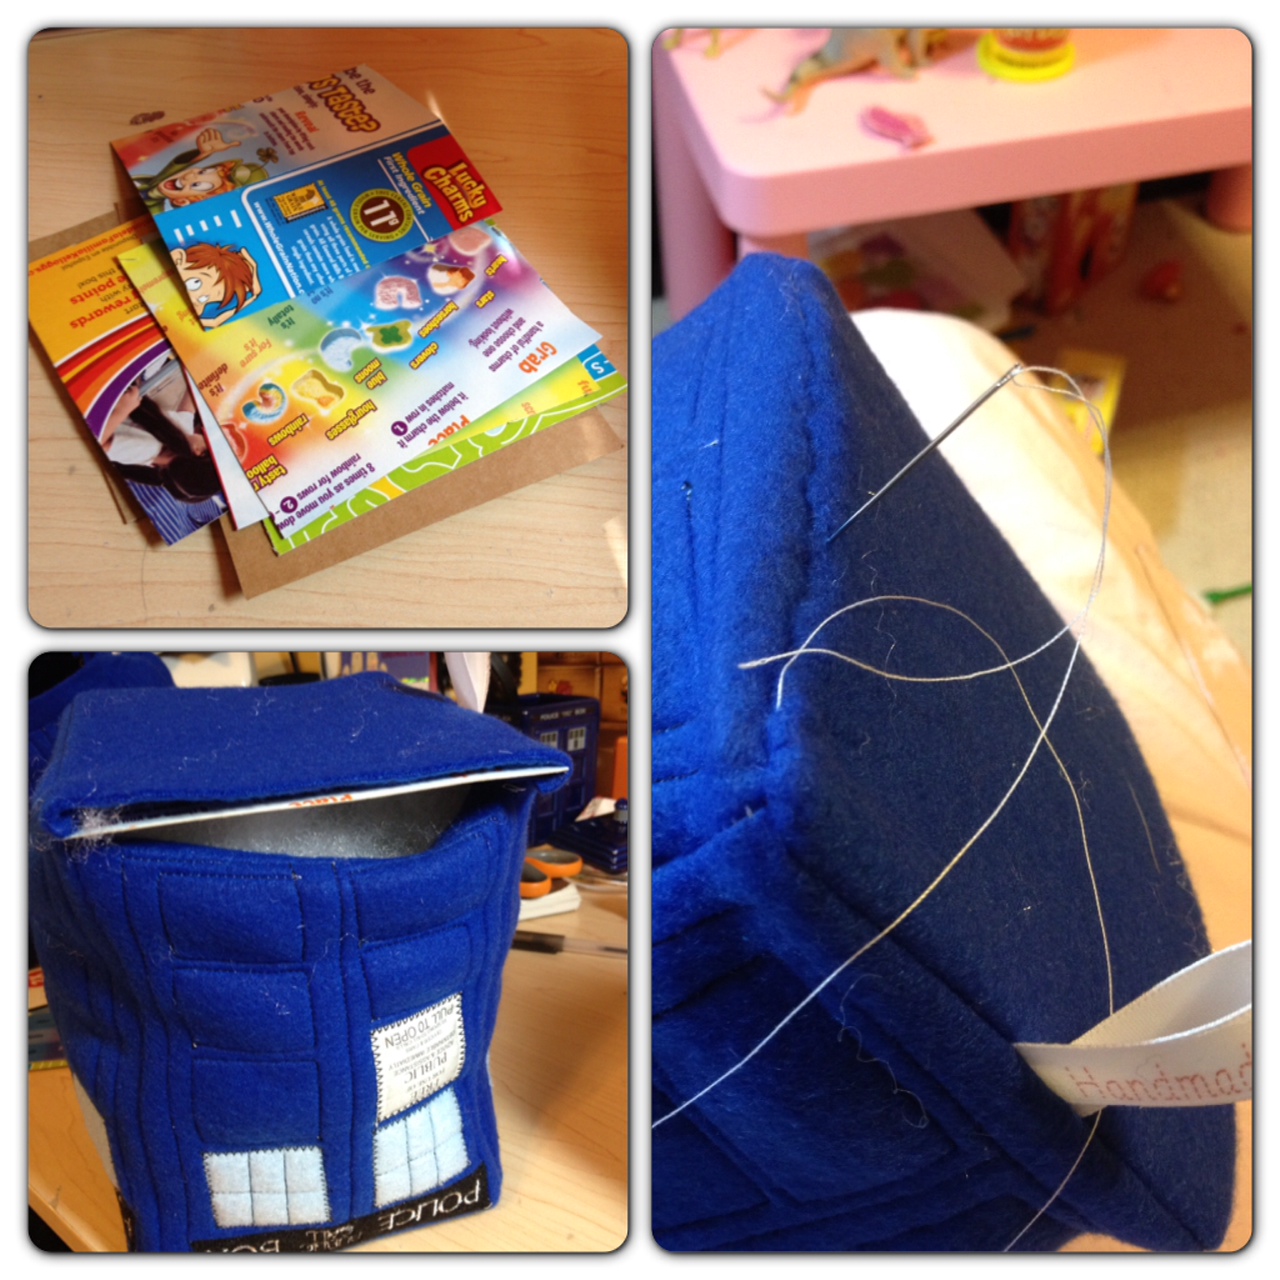
Now the Tardis is about 7″ tall so it needs some stability.  I cut cardboard bases and tops from cereal boxes to sturdy it up.  I place one cardboard piece on the top and stuff stuff stuff.  Then I place the bottom piece and hand sew the opening closed.
FinishingThe whole process takes about an 1 hour and 30 minutes to create a single Tardis. Now whenever I make my plush for shows, I never make one thing at a time.  In this instance I was working on four Tardis’. (es?) Anyway, working on multiples I would complete one whole step for all of them before moving on.  I would say for these four I worked on them a good 6 hours from start to finish. After really studying the amount of time these take and the work they are, I do still love them. But I just might have to raise their price. I know the Tardis doesn’t look that big.  But now you know, it is bigger on the inside. ;)

Guess What Came in the Mail!!

Twice a year a national magazine comes out that is just filled with plush inspiration.  It has been a goal of mine for years to get into this publication.  I have tried before and was sadly rejected.  But that was in my brand new infancy stage of my business.  This past year has been the strongest year yet for me and on a whim I submitted a piece to the magazine.  I found out in December that I was accepted and today I received my early copy.  Can I just say how amazing this makes me feel as a plush artist!  I love my work, I know my buyers love my work, but to be recognized like this is an honor.  I truly appreciate being selected.


I flipped through the magazine, of course searching for my own page.  I found that I was listed in the Editor’s Note, huge surprise there!  Then I found out I was on page 14 of 144!  I know there are many reasons for page layout decisions from the number of pages an article takes, to color, etc.  But page 14!  Wow.


I flipped through the rest of the book and realized the majority are new artists that haven’t been in the magazine before.  In past issues I see names repeated over and over from other issues and always felt they needed someone new.  This issue looks fantastic! Lots of new artists and some well known plush artists with their amazing work.  I am truly inspired! Now back to the Tardis project.

Rocky the Cat

Looking through my work on here I realized I have very little 3D work visible!

Rocky is a character I was working on in the past every so often.  He is inspired from my adoration and love of Garfield the Cat.  Growing up I would say I was obsessed with the cartoon and would not only watch every single cartoon, but have the urge to buy or have someone buy me every Garfield product imaginable that I could find.  I have countless plush dolls, mugs, erasers, toys, figurines.  I have signed artwork from a Paws artist and a signed Garfield cel from Jim Davis.  Garfield greatly affected me growing up in my artistic style, my love for cartoons, my plush design, and I would say my sarcasm.  Now back to the piece. ;)

I modeled, textured, and rigged Rocky in Maya.  I hand painted the textures in Photoshop.  In Maya I wanted to create a soft look for Rocky without having to use fur or paint effects.  I created this velvety texture by duplicating the main body color of Rocky and applying it into the incandescence with a ramp.  This allowed the material to be shown at full color and depending on the angle, a lighter value to create the halo and soft appearance.

The background was also done in Maya and rather fast compared to Rocky.  I wanted to create a scene that is reminiscent from a Garfield special “Out on the Town.”  In the special Garfield meets a group of cats who are members of the Claws gang. I imagined Rocky as the nice member of that group.  He is fully  rigged and has blendshapes for his head.  One day I would like to animate him, I could see him singing something from West Side Story! But for now he is a render.

Together Again

Something I am very interested in and haven’t seen much of is combining my two passions: 3D  and Fabric Design.   I like the idea of creating something on the computer but its finished result is dependent on the fabric and its final stitching and embellishments.  One project I worked on this revolved around Humpty Dumpty.  Below you can see the original render I created with Maya.

I wanted to create something that can be recognized from the nursery rhyme but still be a bit of a surprise.  I first drew a small sketch to build the composition.  Looking at the rhyme, I knew I wanted a rock wall for Humpty to fall off of and mountains in the distance for the King’s men to come from.  But with my twist I decided it was too late for Humpty to be put together again.  I hand painted all the textures in Photoshop and applied them to the models in Maya.

Once the main render was complete, I took the composition and started breaking it into sections to render out separate areas to print onto fabric.  I used my own personal printed and fabric made especially for it.  The fabric does need to be treated with water and let to dry after printing, but using my own I could decide how to break up the sections.  Below you can see the final result.

Similar to how the ground can look from the sky, I stitched the ground together first to create strips of patchwork and give the scene some additional depth.  Next I quilted the rock wall over the background mountains and ground plane.  And for the final touch I added the fabric pieces of Humpty Dumpty and quilted him into the final wall hanging composition.

This was a lot of fun and I have two more pieces I plan to embellish, The Beanstalk from Jack and the Beanstalk and the Spider from Little Miss Muffett.

Sew Nerdy

If you are in the Palm Beach area, this Friday a brand new show opens over at Bear and Bird! Be sure to check it out! Captain America and Wonder Woman are making an appearance, as well as numerous hair clips!

The Swomee-Swan

I will admit this is by far one of the coolest plush I have ever made.  I am incredibly happy with how this turned out.  I loved reading Dr. Seuss when I was little and loved the animation of the original The Lorax animation.  I regret that I have not seen the new version of the film yet.  Having a 17 month old makes going to the movies very difficult.  Even ones she would probably like!

Let me give you a little back story on what, rather who, this swan is for.  I am artist that participates in a local art group called Kick Start My Art.  Every month of so they put art shows on at The Bricks in Ybor, FL.  I try to participate when my schedule allows, they have different themes every few months.  (Check the gallery to see the work I put in shows.)  A few months ago they sent out an email that a local charity was looking for artists for their summer camp.  The theme for the summer camp is Dr. Seuss”The Places We’ll Go!”  The organization is the Children’s Cancer Center.  Instantly I knew I wanted to do something for this group.

I met with one of the amazing women who works there and will be leading two different groups during their summer camp.  I will be leading children in making their own ‘Whoville’ plush dolls. They will be crazy colors, yarn hair, silly clothes, and the kids will be able to draw on their own faces.  This will let them get a plush doll for them to take home and remember their time at summer camp.

As we were talking she mentioned that they planned to decorate their space as much as they can with Dr. Seuss themed art.  She mentioned she hoped to hang things from the ceiling.  As we were talking I thought how cool would it be if a Swomee-Swan was hanging from the ceiling!  I knew this would be a plush challenge.  The weight alone of it hanging and the long neck of the original Dr. Seuss design would be tricky.  I normally work ‘flat’ in my plush and having a true ’3D’ plush would be a great challenge.

I had my husband model a basic version of the swan which I then unwrapped and printed out to scale to build templates from. I knew I wanted this to be big! The final swan is over 3 feet long! Once I had the templates making the swan was not that difficult.  But getting the swan to stay in its proper shape and swoop of a neck would be.  I ended up using some general purpose wire to build a ‘spine’ for the swan.  It works great. One long piece runs from the tip of the head to the tail.  Another pieces runs down both wings to keep them hanging up and not falling flat.  I also added little fun details like the collar and eye lashes.  This is my first sculptural plush and I just hope the kids will adore it as much as I do.

While making this plush I kept thinking back to who it is for.   While we were brainstorming and talking at the Cancer Center, the woman told me they try to make every camp and every holiday as big as it can be because you never know when it will a child’s last particular holiday. That just hit me in the chest.  I could not imagine if something ever happened to my little Zoe that I would need a place like this. This is an amazing organization of some extrememly amazing people and strong parents. My husband asked me ‘when I teach the kids how to make their own dolls, how will I not come home crying?’ I told him ‘Who said I won’t be?’

MetroCon 2012 Coming Up!

Tinkerbellen

In just under six weeks it will be time for the next big show, MetroCon!  I am getting very excited for the show and trying to build up stock once again.  I have forty ice cream cones of eight different flavors currently in production.  I have some more ideas for a new group of quilted logo pillows.  I have ideas for  plush items.  I have this super awesome idea that hubby helped develop.  We ordered special parts for it that should arrive by the weekend.  So many ideas and not enough time for it!  I would like to create some more wall art pieces too but don’t think I will have the time.

My work, The Art Institute of Tampa will also be at MetroCon.  We will have a booth with a green screen for all the cosplay people to take pictures at.  We are also creating portrait sketch cards of us, the instructors with ‘stats’ on the back.  You can see my sketch card below.  Very excited for the show and need more than six weeks!


Insanely Cute Coming!

You Scream for Ice Cream!

This late spring I have two new shows coming fast at me.  And they are anime related, not my typical style.  Ok, not really my style at all.  But I love cute.  I can do cute! My belly plush monsters are cute. I also just completed a piece for a gallery show next month with a little ‘anime’ take to the eyes that I have fallen in love with.  So this evening I started sketching out ideas for insanely cute plush.  I have seen lots of cupcakes out there.  But you know, ice cream is just better!

MegaCon 2012 Recap

This is a little late and I apologize.  I’ve been so busy with shows and work and life this is the first chance I have had to reflect upon MegaCon!

Last fall many of my students and colleagues at AI Tampa wondered if I was going to sell at Mega this year.  I kept saying ‘No, I’m not a Con girl.  I don’t think my work would fit there. I could never make enough’ Then I started thinking, why wouldn’t I fit there?  Should I take a risk and do a Con?  Especially a big risk such as MegaCon? I started looking up past con vendors, pictures from the exhibitor floor, and thought some more.  In the end I knew it would be a lot of work and a big risk, but how else could I get my name out there so fast and to a larger group of people?  I typically sell to just Craft Shows and ETSY and finding a following there is difficult.  Maybe this was my chance to break out!  Answer: Yes it was.

I started designing a new line to fit with the Con crowd.  My own look and style, but something I would want to buy at a Con.  Something that was not necessarily anime, but comic related.  I like cute and fun.  You never see cute and fun comic heroes.  You never see cute and fun hair stuff that’s not kawaii.  And mainly, you never find cute plush that isn’t made in China/Korea/YouPickYourForeignCountryHere.   Thinking along those lines I developed a new plush line and started making hair accessories I would want. I found similar ones in the UK and felt I could make my own here.  I have this fancy smchancy sewing machine, let’s put it to use!

And boy did I.  I was in such productive modes for December and January I often had two machines going at once.  I would set my embroidery machine up to make the hair accessories and on the opposite side of my loft sewing super hero monsters on my back up machine.  For about 6 months I had these pillow forms wondering what to do with them.  About three weeks before the Con my brillant idea came.  Super Hero Logo Quilted Pillows!  (And I was brilliant by the way. I made seven and came home with two.)

Typically I can set my booth up in under an hour for a regular craft show.  But with the amount of product I was bringing when I had the option to come in the day before I jumped at it!  Jay dropped me off with all my stuff and took Zoe shopping.  I tried to create a booth that was inviting and fun.  We were given a 10′ x 10′ space.  So many people had their table pushed up to the front.  Come on people, use that space wisely!  I placed my table back four feet to let them come in and have more room to show my plush work.  I really think this helped.  We used Jay’s Mario canvases as a conversation starter to help pull people in. (Those three canvases are still available if anyone is interested!)

On Day 1 I got there a few hours early to lay all my small pieces out and to check out the competition.  Looking around I saw a few other plush artists but no one had anything like me work.  I was nervous and excited about the day to come.  Would my work be liked?  Would I do well?  Well, before the show opened my neighbor came over and bought my two largest monster canvases that I brought for decoration.  I brought them to fill my space, I honestly didn’t believe they would sell.  And they were the first to go!  I brought 6 canvases and came home with two.  I am serious when I say I had these 6 for over a year and  a half.  And to be gone that fast? Wow to me.  Doors open, the madness begins.  I was selling like crazy and selling items I honestly didn’t think would go.  My super heroes were doing well but the pillows sold fast and my normal plush that I do all the time nerly sold out.  My awesome hair accessories barely sold at all.  My coffee cozies were a great item and did very well.  My goal for Day #1 was to make back the fee of the space. I was short $10 of that goal.  All in all an awesome day 1.  If I compare my earnings to a regular craft show – I killed it.

Head on Day 2, the longest of the three days.  We knew this day, the Saturday of the show would be the craziest.  And it definitely was.  Barely any breathing room!  Sale after sale after sale.  I honestly can’t believe how well I was selling. The audience I always try to sell for was there.  Everything was selling on Day 2. I really wanted to go and look around but discovered that would have to wait until Sunday. My goal for Day #2 was to make the booth fee again. I passed it by a lot.  Again, killed it!

Day 3 – We are ready to go and hope to have nothing to bring back.  I have to keep rearranging my spaces because they are starting to look bare.  I start directing people to my website because at this point three of the six super heroes have sold out.  Please note I came with five of each! I had a little break when it was thinning out to go look around.  I made a trade and bought one item from other artists.  One problem I always have with craft shows and cons is I don’t want to buy something I know if I had the time I could do myself.  You really need to impress me to get me to buy from you.  Saying that I traded with Chris Hamer and bought from Keith Rein. Really nice, talented guys. And I splurged  and bought a Freddy Moore Girl figurine.  I had been dreaming of her for over a year.  Day 3 goal was to make the booth fee again.  I was short $10.  Again, I killed it! And I couldn’t believe it.

MegaCon was an absolutely wonderful time.  We are definitely doing it again next year.  Come check us out in Independent Press, booth # to be determined at a later date.  It will be under Handmade3D but my boss, who had never seen my personal work in person until MegaCon, says I should change my business name to “Ellen Awesome.”


The World is Ready For You!

It’s Wonder Woman!  At MegaCon and Tampa Bay Comic Con I had multiple people ask me if I had a Wonder Woman. Here she is!

And no, I did not make her Lasso of Truth.  I want my plush to be welcome to all ages and that wonderful lasso as cool as it could be, could be a strangulation hazard and it’s left off. Check the Shop page if you are interested!