King of Scrap – a fairytale quilt journey

I love to enter quilt challenges.  It’s never about winning. It’s about expanding my creativity for a specific challenge and being accepted.

Winning is just a bonus – and spoilers, there is a giant bonus for this quilt.

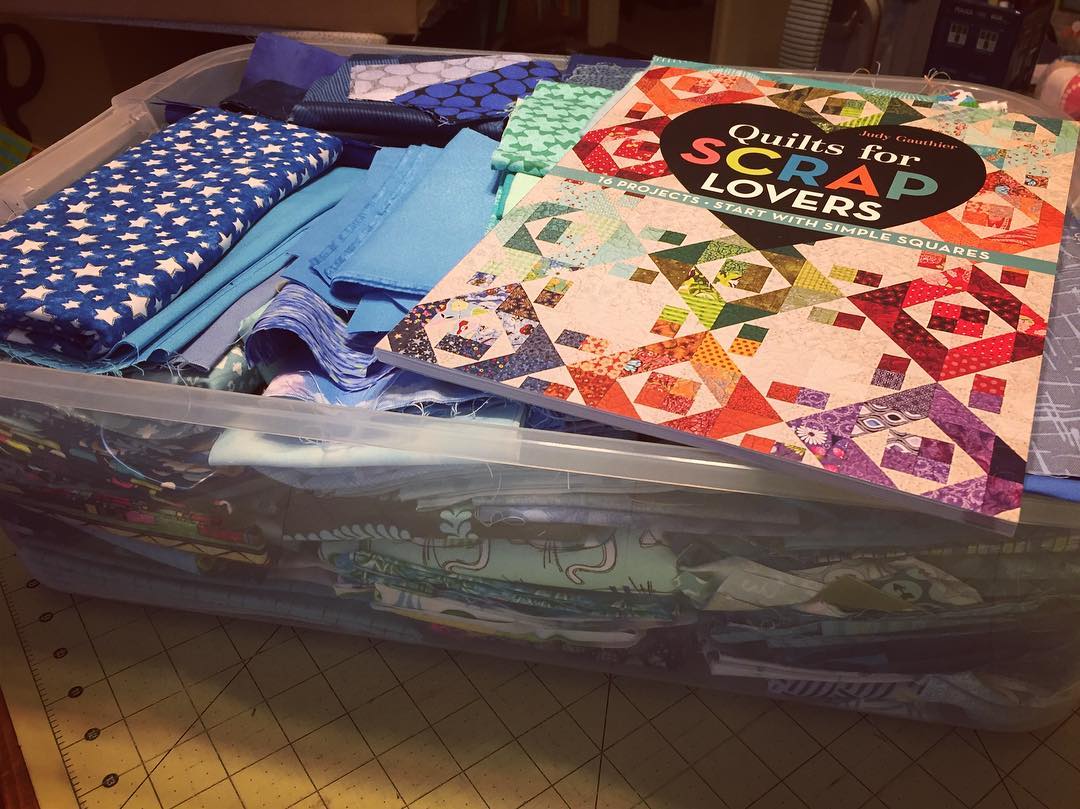
A few years ago I found a quilt challenge for Judy Gauthier’s Quilts for Scrap Lovers book. Finding information on her website about the challenge was perfectly timed.  In a place where I imagine most quilter’s reach – having more stash fabric than I know what to do with- this challenge was right up my alley.  Her book is formatted very well with quilt projects that are based on blocks.  Blocks of similar sizes made it quite easy to pick and choose a few favorites to work with.  For her challenge she had a size guide of designing a 72″ quilt which is a very make-able quilt. Not too big, not too small, and will use up a fair amount of scraps.

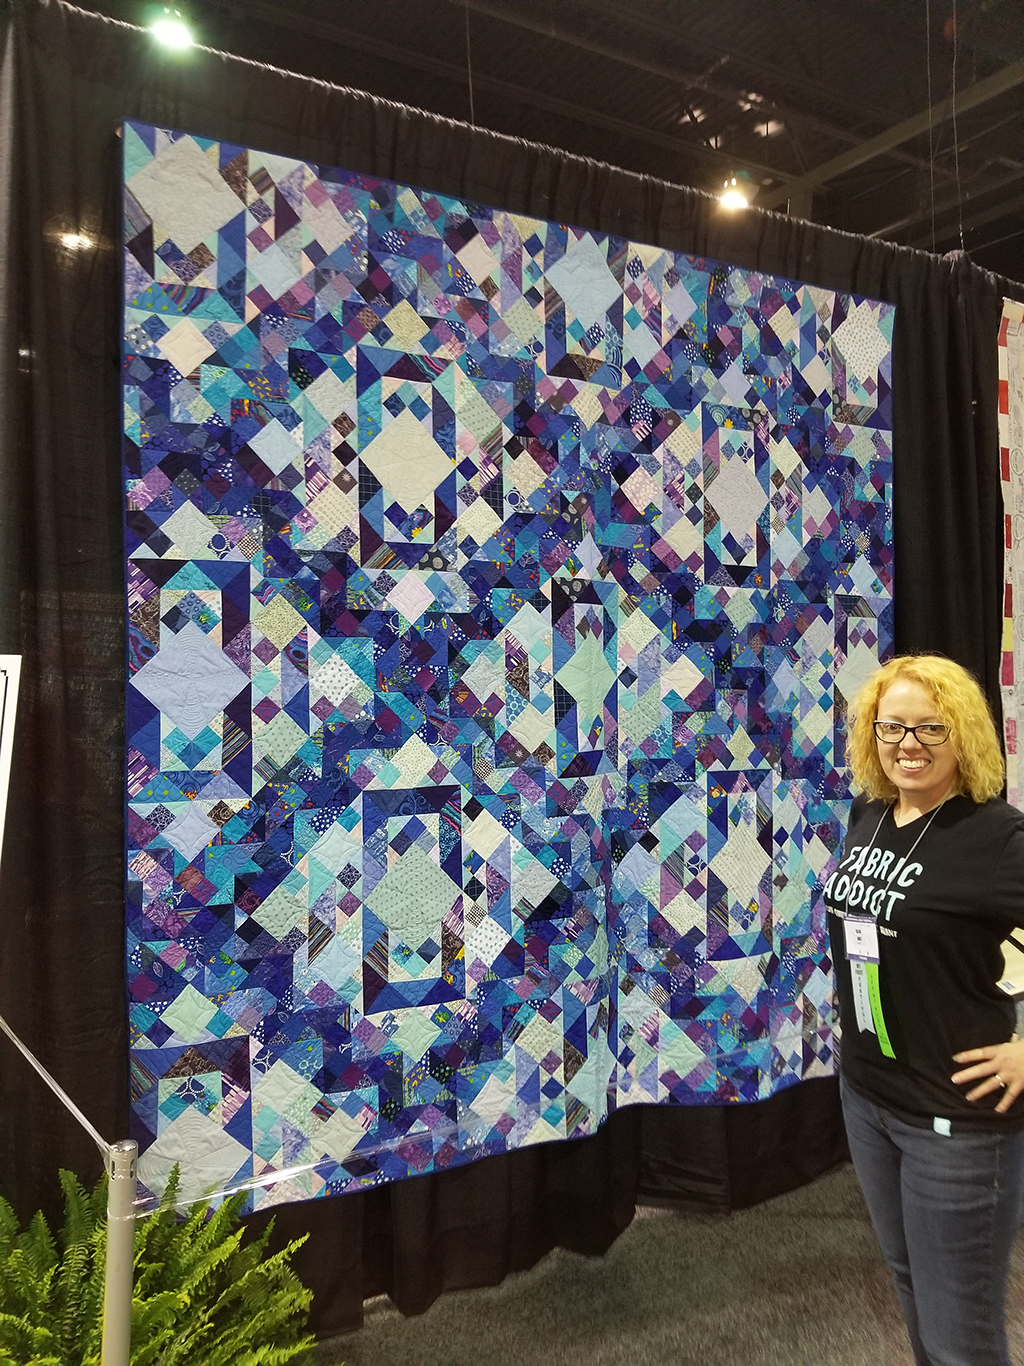
Working in EQ8 I created a couple of her block designs and started playing with the layout to create a design I liked. Beginning with her Sunshine and Shadows block and Chevron block, I was able to create an on-point quilt layout. My blue bin of fabrics was overflowing so I decided to create a monochromatic quilt with these two blocks. I used EQ8 to create the layout and have an idea for how much fabric I would need.  However I ignored the cutting directions, I already had them written for me in her book. Why bother with EQ8 directions that were asking for 15/16 inches and other odd numbers.  I was making 8″ blocks, I didn’t need any of those odd numbers! Right? Here became a fortuitous accident for the quilt’s story.

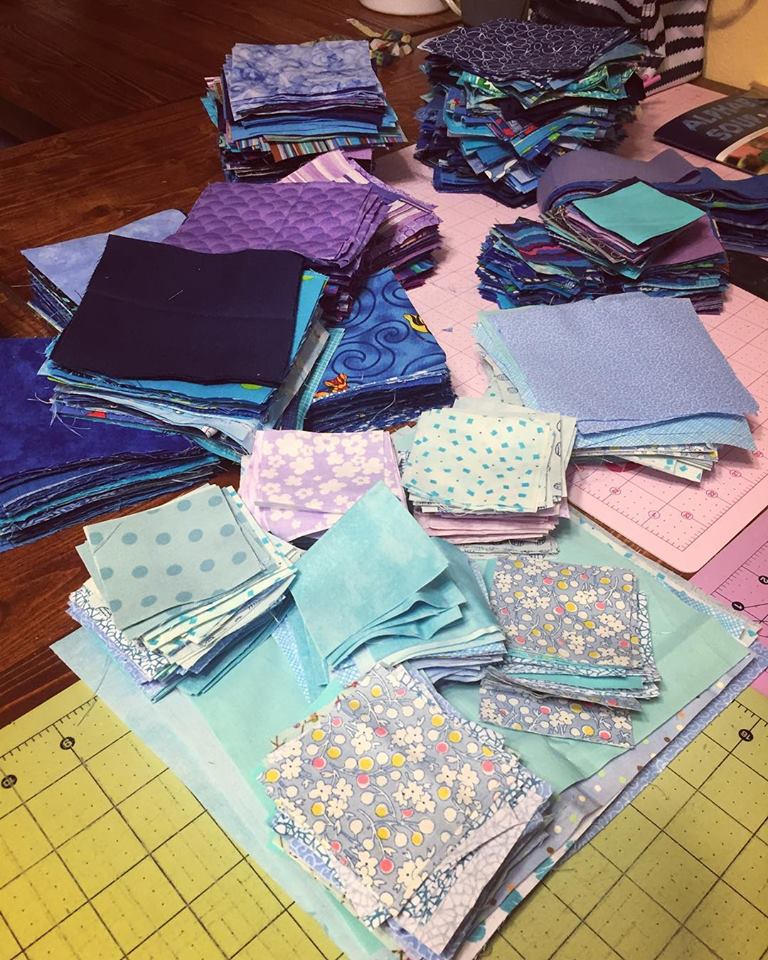
I knew I had a mountain of squares to cut. MOUNTAIN. To make this quilt I borrowed an AccuQuilt to help cut the squares but really, it didn’t help at all.  I could only do two layers of fabric at a time and still had waste cuts. After bothering with it for a few hours, I went back to the good ole ruler and rotary cutter.  I tried a Stripology ruler as well, but with having to keep turning it, it wasn’t very useful either. In the end, I believe I counted 2083 squares which many of them had to be turned into half square triangles. Working in these 4″ squares I didn’t really have a size understanding of the quilt. It looked like a lot, but that’s what EQ8 said I needed! So I just kept cutting and quickly realized even though my blue scrap bin was over flowing I wouldn’t have enough fabric.  Spreading into purple and just a bit of aqua, helped fill in the gaps.  Plus ‘shopping’ from my mom’s fabric stash I was able to secure enough fabric.

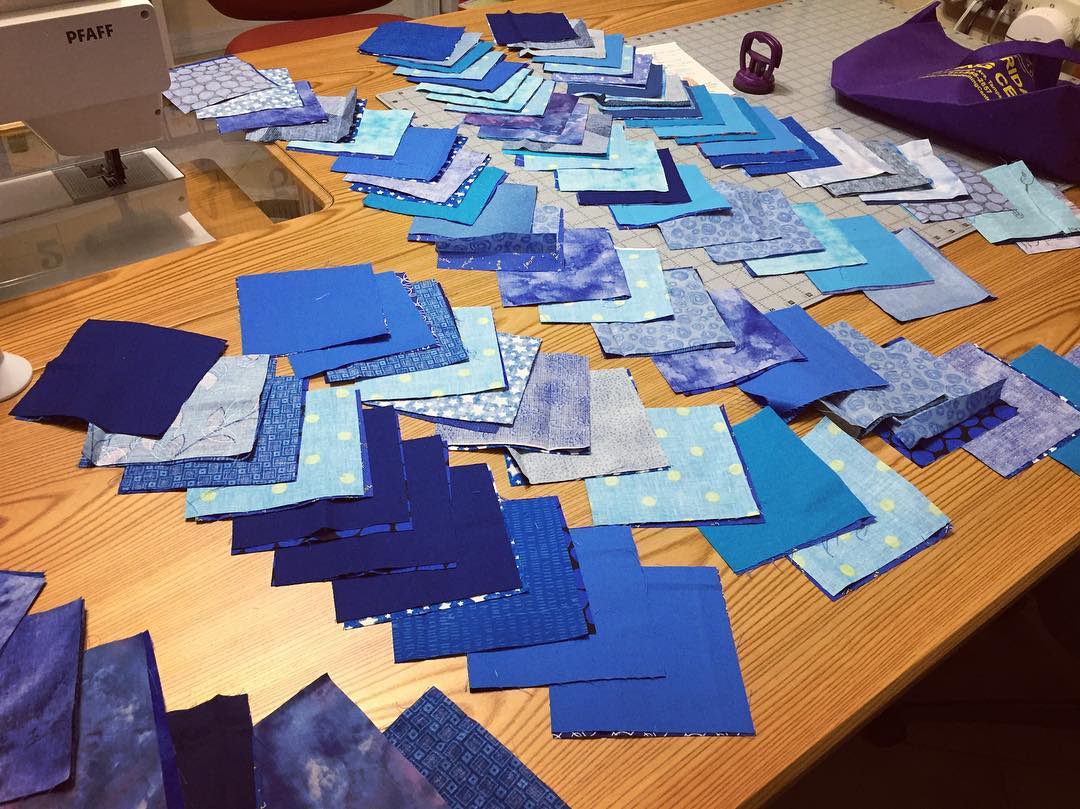
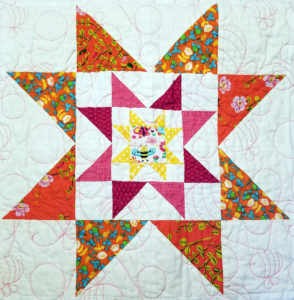
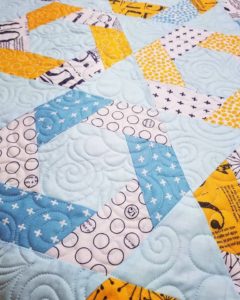
It was time to assemble!  Going off me design I knew I would be working from majority of light and dark fabrics to create the designs.  Pairing deep blues with light blues I created a million HST units which became the chevron sashes.  I was very excited in how the sash design was forming. It was an 8″ sash to go with 8″ blocks. No worries – right?

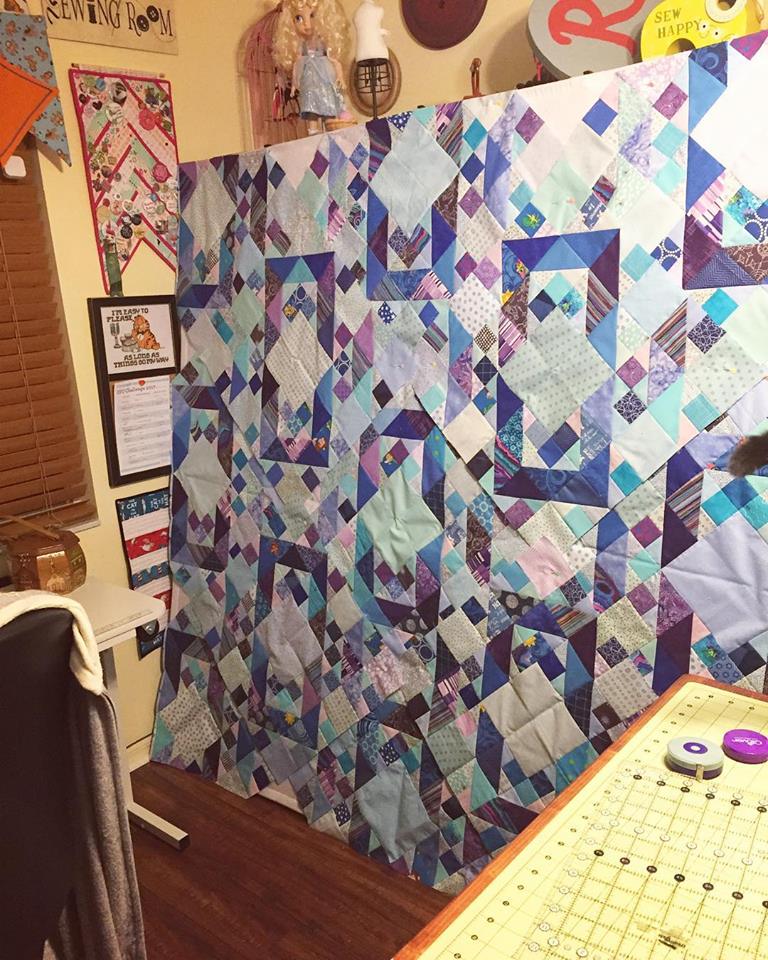
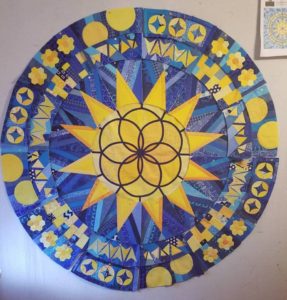
It wasn’t until I was a good few weeks in on this project and starting putting units up on my design wall that I realized I had a problem.  My design wall is 72″, the size the quilt needed to be.  Once I was putting up my block units of the quilt I quickly realized my sizes were all off. My units were overlapping and I didn’t have the sash on yet. But how? I made 8″ blocks and 8″ sashes just like I was supposed to! I went back to EQ8 and saw that odd 15/16″ markings again. I figured I just drew a block slightly off but slowly I began to realize something.  I was using Judy’s 8″ block designs but my quilt design was on point. An 8″ block on point is not in fact 8″. It’s actually 11″ across. So those odd numbers that EQ8 was telling me which I ignored – were the right measurements. Doing some more quilt math I quickly realized that my 72″ designed quilt was turning out to be 100″ square. Yep. 72″ to 100″. Time was of the essence.

I believe this was sometime in early December when I realized my sizing error. Still going with the quilt, I emailed Judy to make sure if I submitted a larger quilt it would be ok? She replied yes, that the 72″ was the minimum actually. Oh good, my giant 100″ would still be acceptable! Second question – the challenge was really about creating a design with her blocks. Did it have to be quilted by the deadline as well? I had less than a month to finish making the top, quilt it, and bind it. Add in that it’s December. Family obligations include holiday decorating, planning my daughter’s birthday party, it’s my husband’s birthday as well, Christmas, and leaving on a family trip on December 26th.  Getting the entire quilt done before Christmas even though the deadline was December 31st was just not going to happen.  Luckily for me, a top was all that was needed to submit.

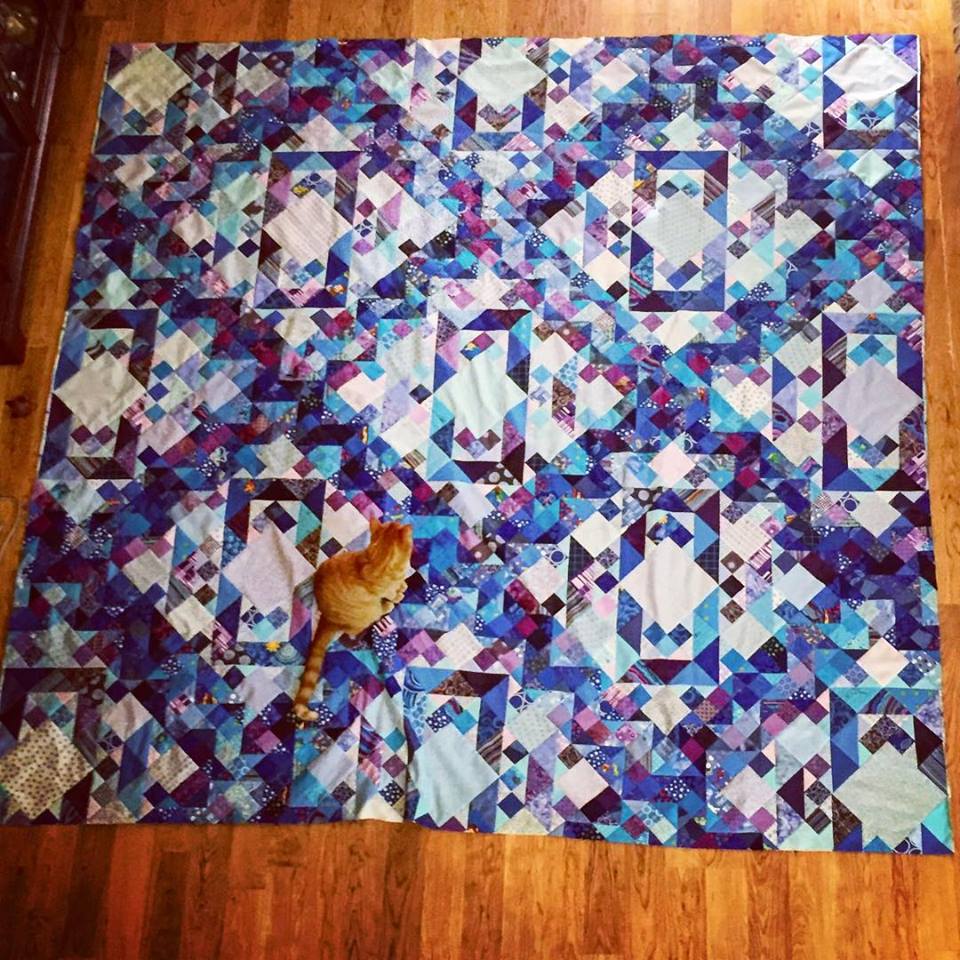
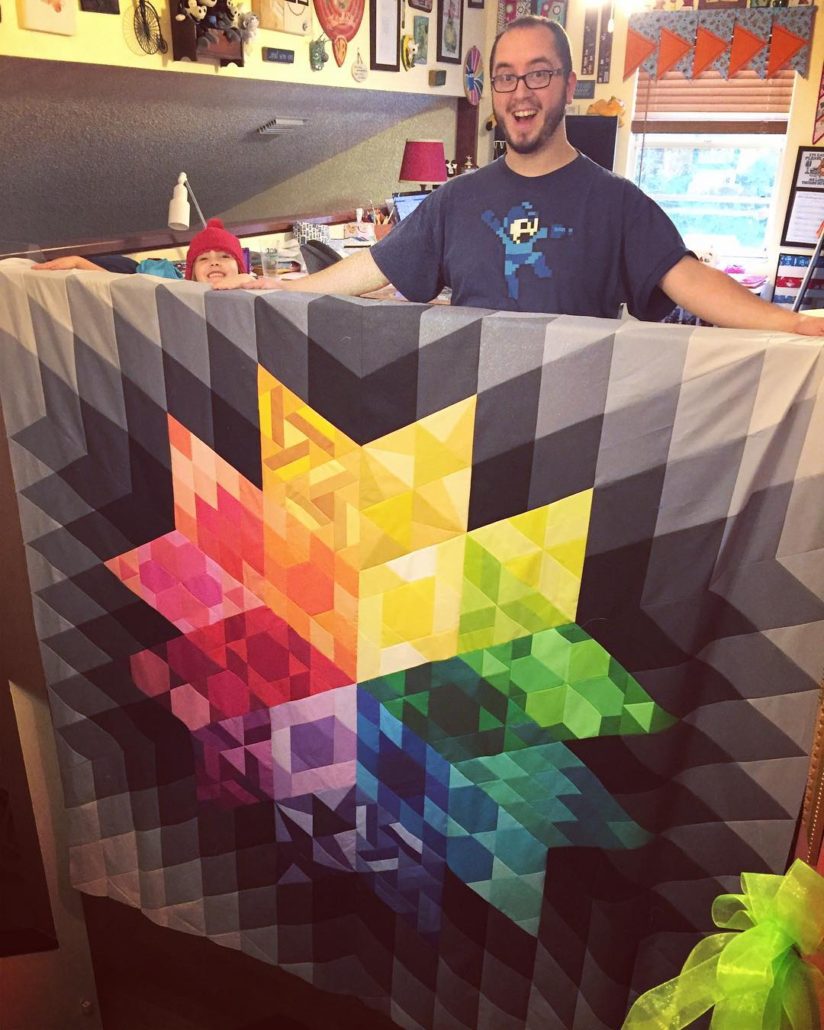
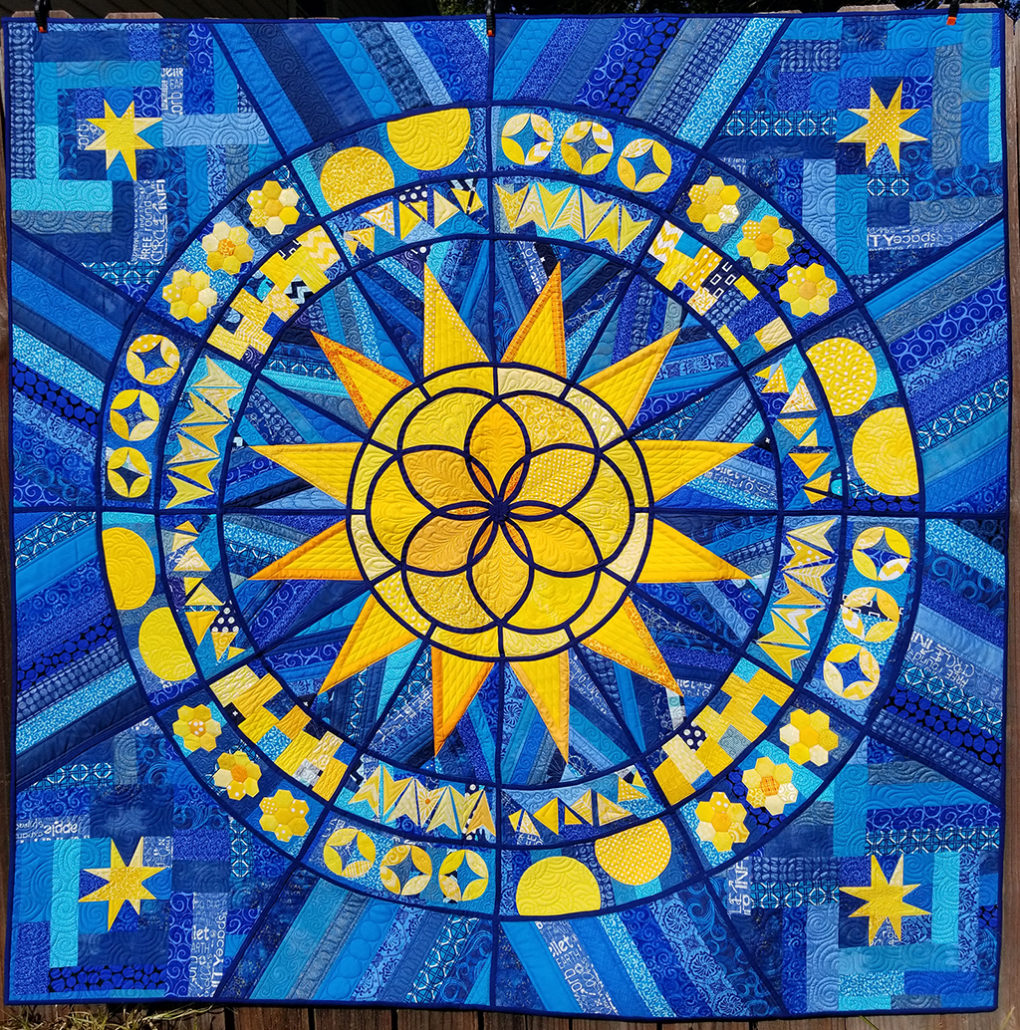
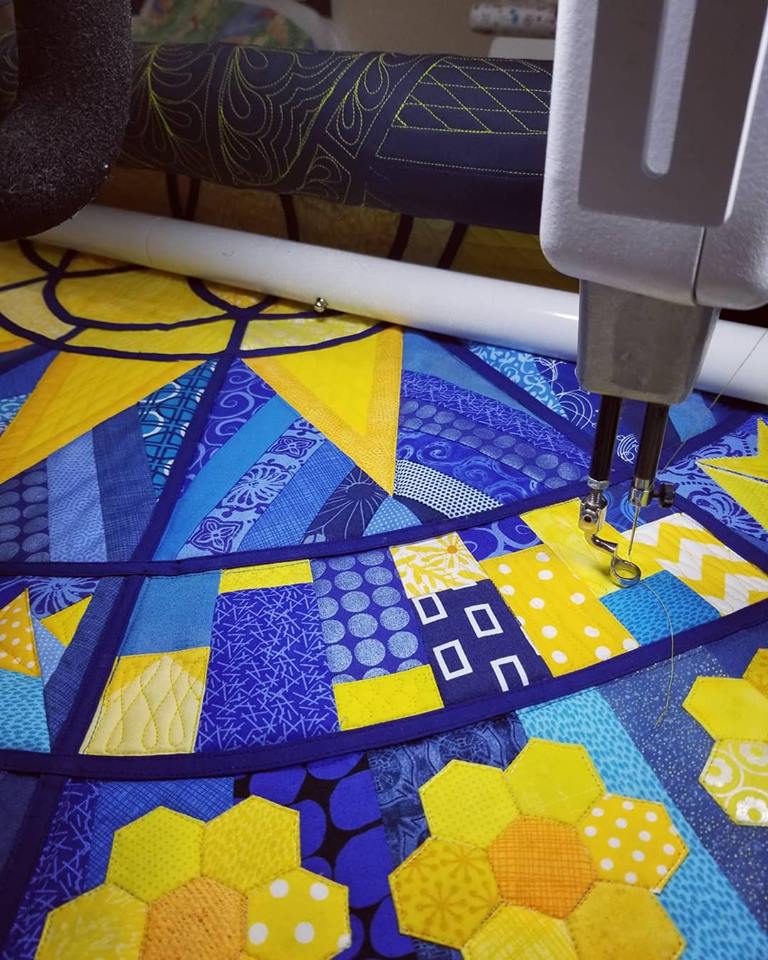
So when you have a 100″ quilt, how on earth do you take a photo of it? Ok, I live in Florida – taking a photo outside is ok – but still the size of it! I moved all my living room furniture out, vacuumed up a million dust bunnies, and laid the quilt on the floor. Taking the picture from my second floor loft was the only way to do it! Dedication for quilting: we do what we need to do, even vacuuming.

I emailed off my picture and went on my family trip. After getting back I knew I wanted to finish the quilt even if it wasn’t accepted.  All that work deserved to be quilted and if all else failed would become a new quilt for our bed.

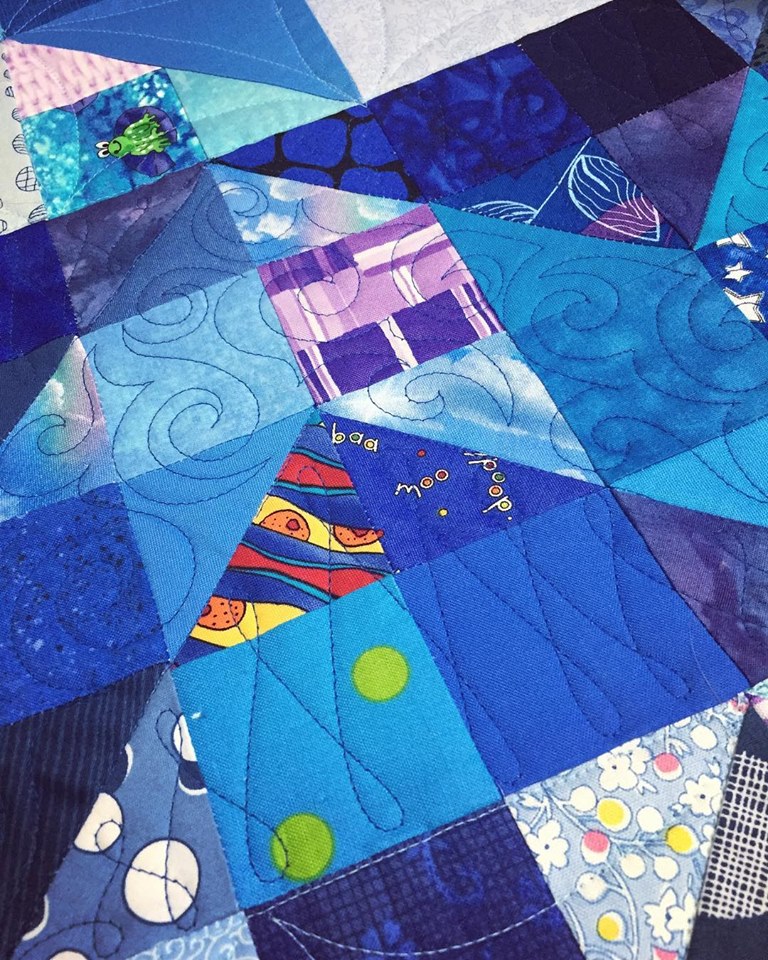
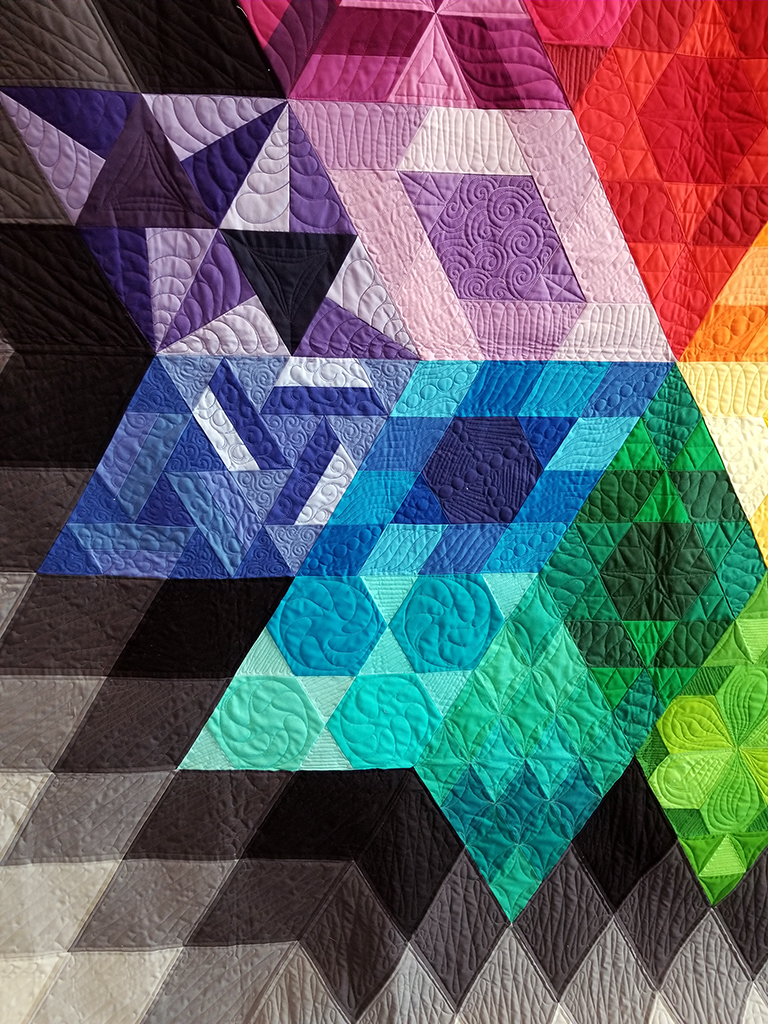
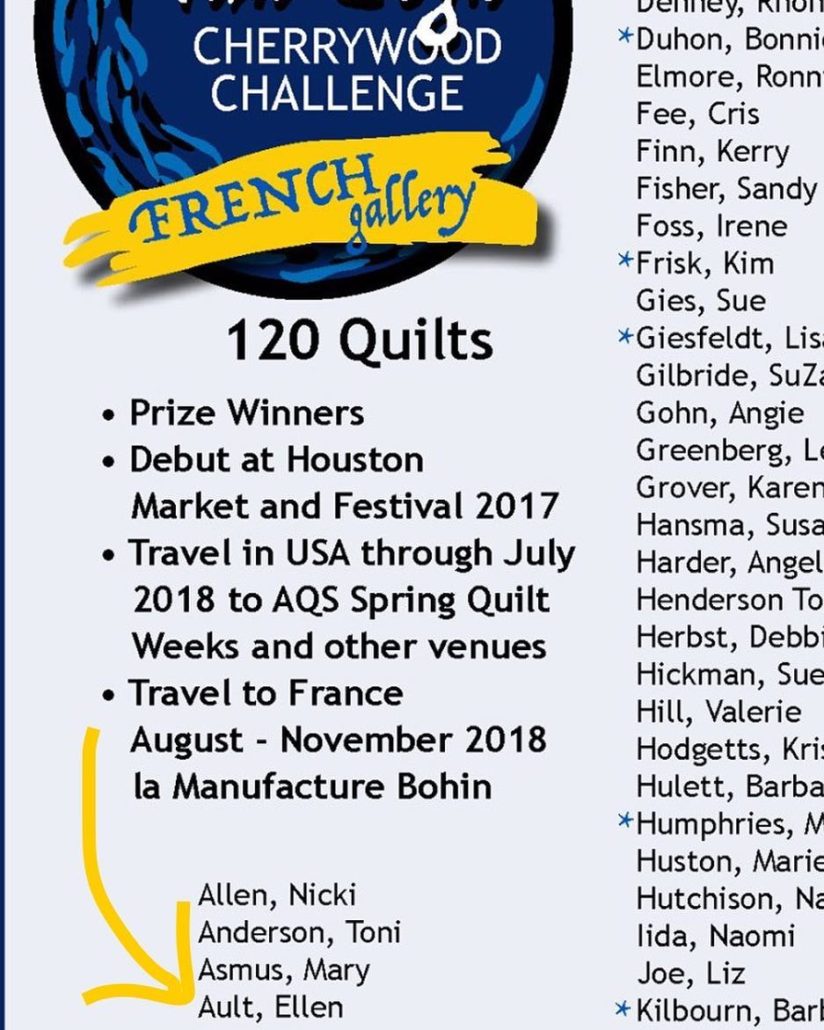
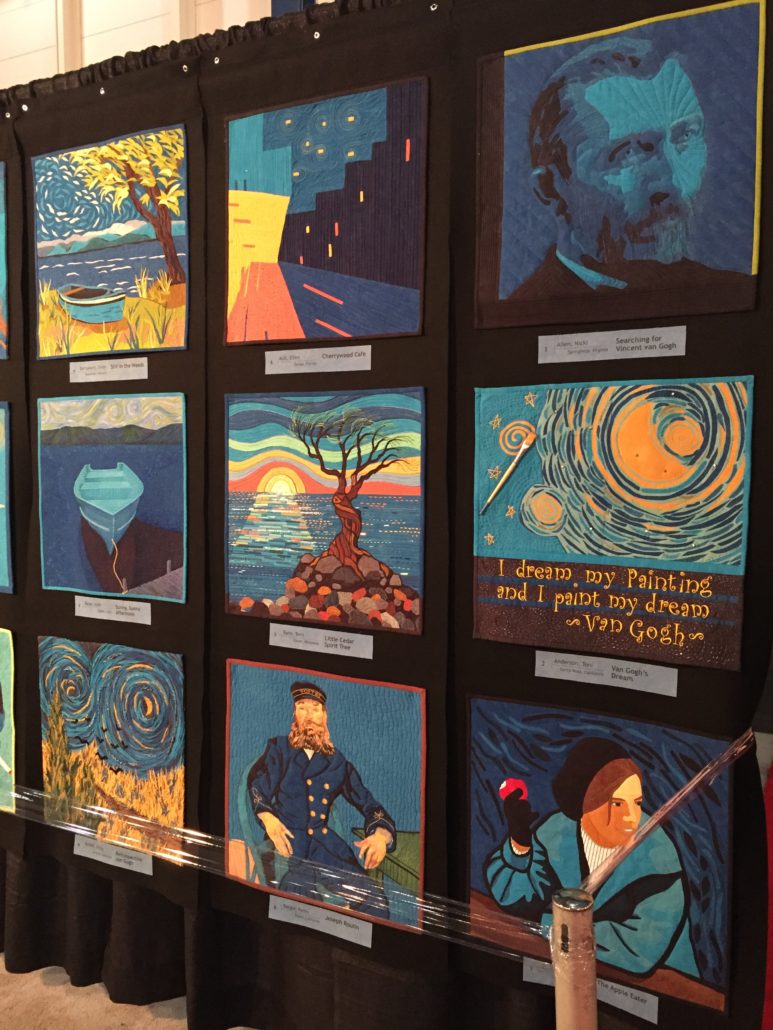
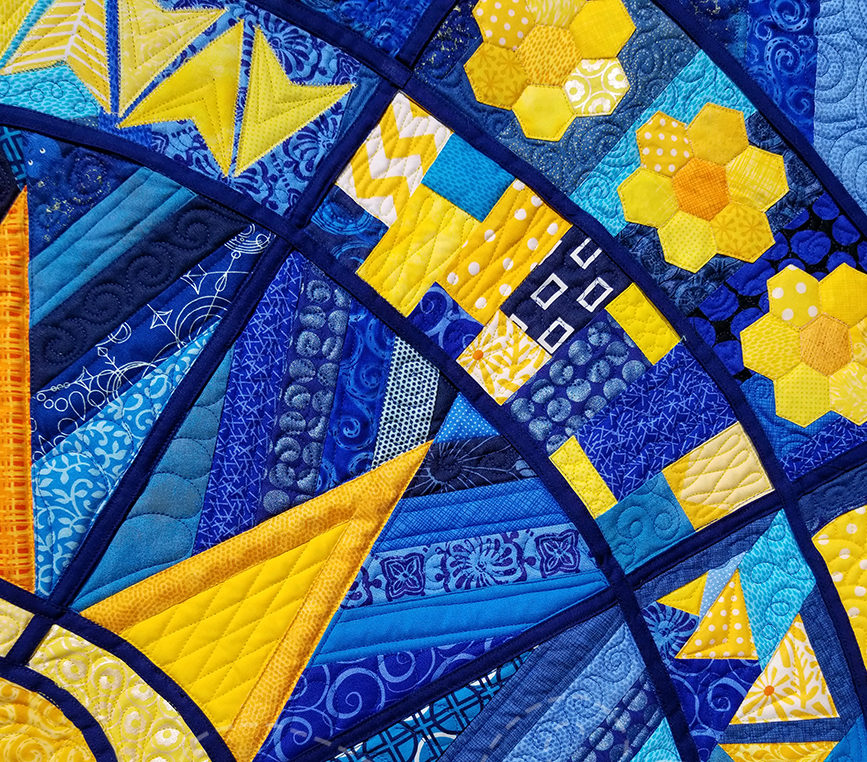
My quilt was on my Handi Quilter longarm for a good week.  I wanted to add lots of quilting details in the center blocks, sashing, and such.  I’m very happy with this quilting but looking back, I could have kept going! After I had finished the quilt I learned my design was accepted!  I needed to take a new photograph of the quilt and send the image for their publishing purposes.  Whose you ask? Why the International Quilt Festival in Chicago needed the photo! This is such a wonderful accomplishment, to display a quilt at IQF.

Of course my mom and I made plans to go see my quilt, why wouldn’t we? She had been to IQF Chicago many years ago before I was a quilter and we both had been to International Quilt Festival Houston.  It was a great little weekend trip up to Chicago even though it was freezing! Luckily our hotel was connected to the convention center so we barely went outside. Those Chicago winds you hear about are true! We viewed all the quilts in the exhibits on Friday, which were awe inspiring, coming back Saturday to do shopping and then flying back out on Sunday.

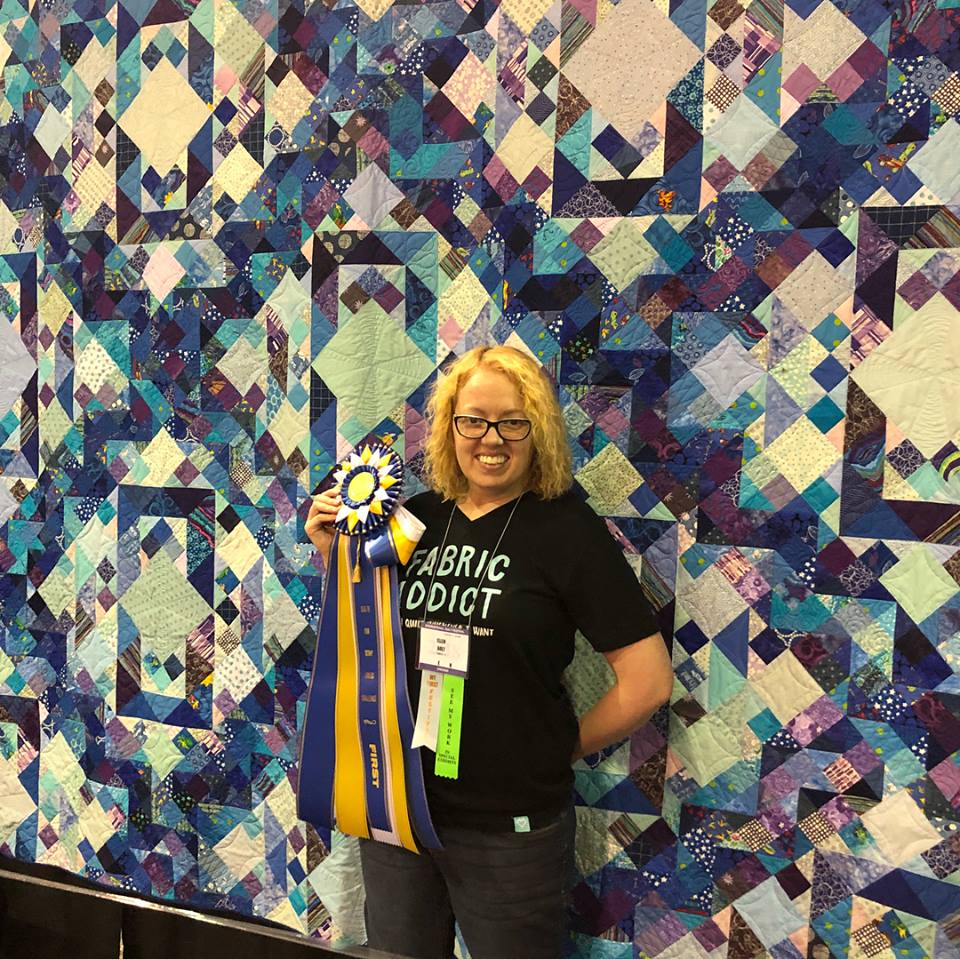
While we were walking out to an early dinner on Friday we were stopped before we had a chance. A woman came up to me and stopped me – knowing exactly who I was. In return I had no idea and stepped back.  Seeing her badge I realized it was Judy! How fun to meet her! She was very happy to see me and she asked if we could stay for a few minutes to help hang the awards. Ok – being completely honest I had no idea of winners for her exhibit. I had a quilt hanging in the International Quilt Festival and that was all I wanted. Then Judy has this giant box and hands me this GIANT ribbon, for MY quilt. Hello! She loved how I took her blocks and created this design.  Such a surprise! This quilt was such a fun quilt to make, learning along the way to pay attention to measurements, and a memorable trip with my mom. Judy’s exhibit was well received and traveled to the International Quilt Festival Houston as well.  Guess a trip to Houston that fall was also in order.

Getting Published! Guess how many magazines I was almost in?

This is the cover of the July/August 2019 Quiltmaker issue. First off, no – I am not the cover girl.  Let’s not get up too high on that horse. Getting my quilt design in this magazine amazes even myself. I thought it would never happen. Read on . . .

First we need to travel back to 2016 on Instagram.  Maker Mama Adventures put out a call on Instagram about quilt fabric selvages.  (Search #selvagechallenge2016 to see amazing projects.) I knew I wasn’t the only fabric lover saving these! I love quilt challenges and here was one to use fabric, scraps, and selvages I already had.  I wanted to design something that really showed off the selvages and keep the color families together. Poof! My “Pop of Color” was created!  I love working in curves and had recently learned how to do inset circles.  Here was my match made in heaven.  Even though I didn’t win, I did fairly well in the competition and held on to this quilt and this design.

In late 2017 I came back to this quilt.  I knew there was something special about it.  I designed the quilt in EQ8 and did a lot of quilt math to figure out how to actually make it.  Since I did all that work why not enter it in a magazine! Well, if you have ever entered a design to a magazine it takes a while to hear back. But low and behold I did.

I am getting published in Modern Quilts Unlimited!

I had to rewrite my instructions to match their style, do a few step outs for photography, create a few other uses for the blocks, and had it all ready to go.  I literally had the entire thing created, emailed off my files and had the quilt in a box to mail to the editor.  I receive notice the very next day that Modern Quilts Unlimited is being cancelled. Nuts- I love their magazine. Double nuts – not being published.

Back to the design wall! There are other magazines, right? I found other submission guidelines and sent off again, to wait for a response I wasn’t sure I would get.  I knew it was a good design, but an intermediate one for sure. It’s not like this would ever show up in Quick Quilts, right?? So happy email to me when I hear I am accepted again!

I am getting published in Quilty magazine!

I told the editor that I already had everything ready. I just had to change my formatting to match their style and create a couple new graphics to help display the techniques per their request. Box ready. Mailed – Phew. That was a close one. No really. A month after I sent out my package I hear Quilty is being discontinued, shut down, kaput. Really magazine gods?? They already had the entire thing! Not again! But this time fate was on my side when I received an email from my editor that my project was being saved, sent to a sister publication.

I am getting published in Quiltmaker magazine!

This time it stuck. I did get pushed back a few months – but it came with a push back bonus! I received an email from my editor which I opened with trepidation. Please don’t tell me your being discontinued! This news was much better. Quiltmaker now has a new feature in their magazine called “Meet the Designer” and they chose me as one of the three for the issue. Happy dancing!! Published and a design spread?? I am so thankful to Quiltmaker to be in this issue and receive this spread. Good things come to those who wait.  7 pages to be exact. Like this will ever happen again!

If you would like to read my “Meet the Designer”, make my quilt design and 10 other great quilts, you can purchase a copy HERE.

The Risk and Beauty of Online Quilting Bees

I have found that the majority of quilters love to sew with others and share their work. Although based on your location you might not have a guild that fits your style, a quilt shop with an open sew, or a community to reach out to. Welcome to the internet world where the ‘social’ aspect of quilting makes is easy to find your people!  When I first started quilting years ago, I ‘instantly’ fell in love with Instagram.  So quickly I was able to find quilters that liked the same fabrics, the same styles, and I could follow as many as I liked.  Then I found online swaps and bees!  First I joined a few swaps, thinking doing a one-off swap would be a good starting point. It was and it was nice. I was happy with what I received in return, even though it wasn’t *really* what I hoped for.
Then in 2014 I joined an online quilting bee and here is where I found my true people! A group of quilters all working from the same book and sending each other blocks for a matter of 12  months.  Instantly I had 11 new online quilting friends.  We created a hashtag, picked blocks and color schemes, and had a wonderful time.  I still follow many of those quilters today.

But an online quilting bee might not always turn out with the luck I had on my first. There are a few risks in joining a quilting bee.

Risk #1 – Quality Control

When you join a quilting bee there is probably a set of standards or guidelines set up.  You might be working from a specific pattern or specific collection of fabric – which is what enticed you to join the bee. Then the fun begins with making and sending blocks until it’s your month’s turn.  You chose a block and a group of colors for everyone to use and you eagerly check your mailbox that month, waiting for the blocks to arrive.  Your blocks start coming in and it’s so exciting! But you take a closer look – is that block the right size? Is it square?  Is it even the right fabrics?  What if the quilter made it in the right colors, but didn’t use quilt shop quality fabric?
Unfortunately these things happen. Honestly, you have no ability to control what people send you.  Hopefully the blocks are the way you want, but they might not be. You have to decide how to use the blocks you receive.  If it’s not a perfect block, can you square it to fit? Maybe you piece it into the back of the quilt or use it as the quilt label.  Maybe you create the top as is and then donate the quilt to someone who will love it.  Or donate a bunch of blocks to someone else’s UFO project.  Ask yourself, will the person that sent you the block ever actually know if you don’t use it?  What is important is to acknowledge and thank the quilter for sending their block even if it’s not perfect.  This block could be more advanced to them and they did their best effort.  They held to their commitment to make and send you a block, using their time and fabric to do so.  If it’s not the quality you expected, take it with a grain of salt.

Risk #2- Missing Blocks

If you have been in a quilting bee before that didn’t go well, you may have a fear of being placed in a group of quilters that everyone starts off with tons of energy and excitement, but dwindles as it goes on.  What if you choose a later month and people don’t want to participate anymore? What if you are in a group of 12 quilters, and you only receive 10 blocks? How are you going to make a quilt?  These may seem like trivial questions, but they have been asked.  We hope every group in a quilting bee gets along swimmingly and all exchange blocks for the duration of the project.

Sometimes life happens, and you might not get all your blocks. For the quilter who didn’t send a block, you may not know what is happening in their life.  The easy thing is to ask them! Ask if they are still working or need more time.  Is the block more challenging than they thought it would be? Did they run out of that color fabric? We now know life happens, and it can happen hard.  Are they located near any fires and need to leave for safety? Are they unexpectedly out of a job and need to count every penny, which includes postage? Obviously they don’t need to be that honest, but if you are in a group that is counting on you, we hope the quilter will at least respond and tell us “I’m sorry, I just can’t do this month.” You may jump to the worst conclusion, but give the quilter the benefit of the doubt and ask. If you get no response, well it looks like you just need to make yourself another block.  Good thing you already did one for yourself and you know how!

Risk #3 – It’s My First Bee

Maybe you are scared to join a quilting bee because you never have.  What if they don’t like my skills? Will it be too time consuming? What if I don’t like it?  But you know what, we bet you do like it.  This can be awesome.  You’re going to make a group of new quilty friends that all love the same thing you love.  They joined the bee because they like the pattern, the book, or the fabric.  They joined to make new friends.  You might live in an area that doesn’t have a lot of quilt shops or classes, or guilds that are not in your style.  Sometimes classes and guild meetings may be when you work and you just wish you had something you can be a part of on your own time.  Here lies the perfection of online quilting bees.
When you send out your first block, you might be a little nervous.  But with each block you will gain confidence and a new friend.  When the time comes for your month, you will see everyone’s gift coming in to you.  Getting the mail will be exciting, not knowing whose block arrived.  As soon as you have the full set you will be tempted to put them all together, even if it’s only a design wall for now.  Whenever you do finish the project, you will always remember the group of quilters it came from.  You will remember the blocks you sent, the challenges you may have had, and overall the fun of the bee.  You might forget their names over time so if you’re smart, write them down now (speaking from experience – lol).  But you won’t forget the feeling of receiving the blocks, the feeling of finishing a project made from a group of special quilters.  Be it one month from the bee, or three years when you finally finish it, you will remember this quilt and its origins.  This is what  quilting bees are truly for.  You found a new community of quilters, a group of friends, and a quilt that will forever have a special meaning to you.

This quilt is from the first quilting bee I ever joined, and loved.  Search the hashtag #moderninstabee2014 for great inspiration.

Block is Triple Star from Modern Bee: 13 Quilts to Make with Friends, by Lindsay Connor. I love this book and go back to it all the time.  It has great quilts to make by yourself, too!  😉

Vangogh’s Galaxy – My biggest finish of 2018

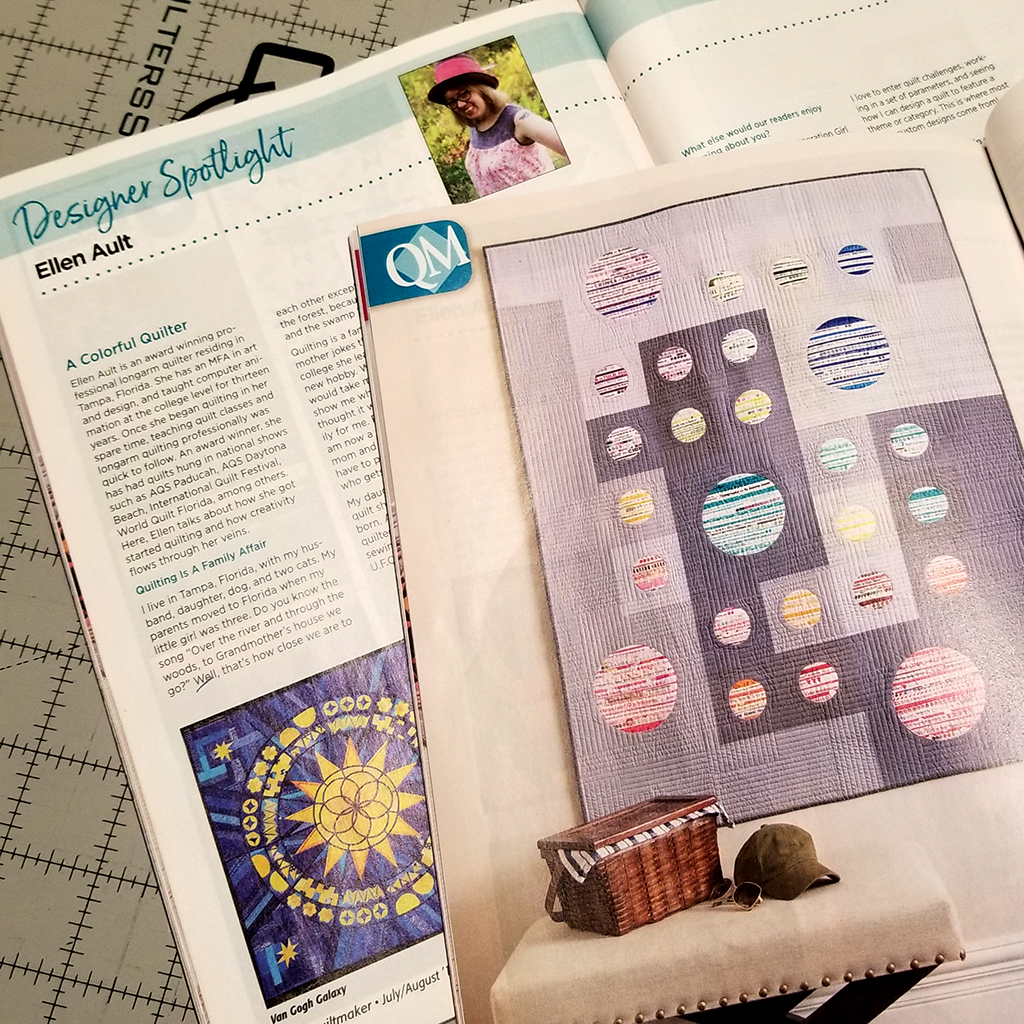
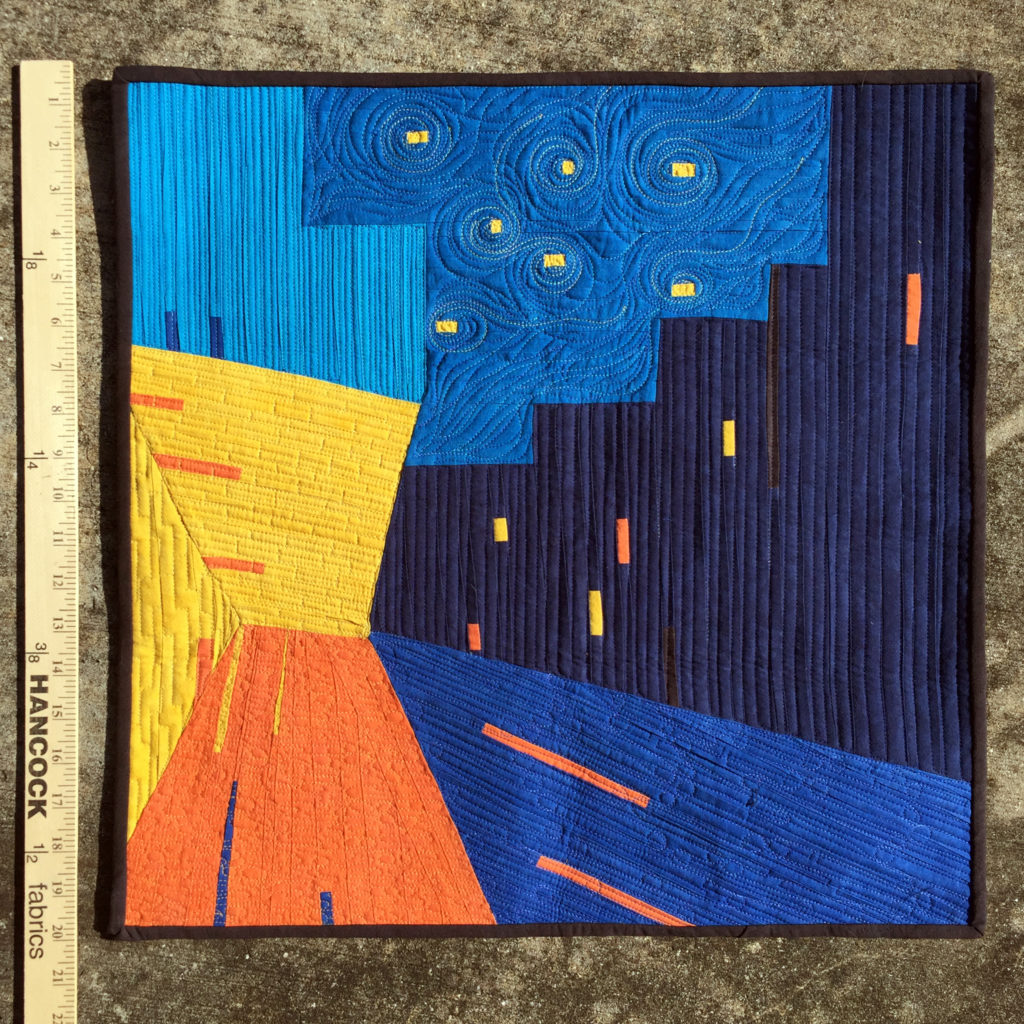
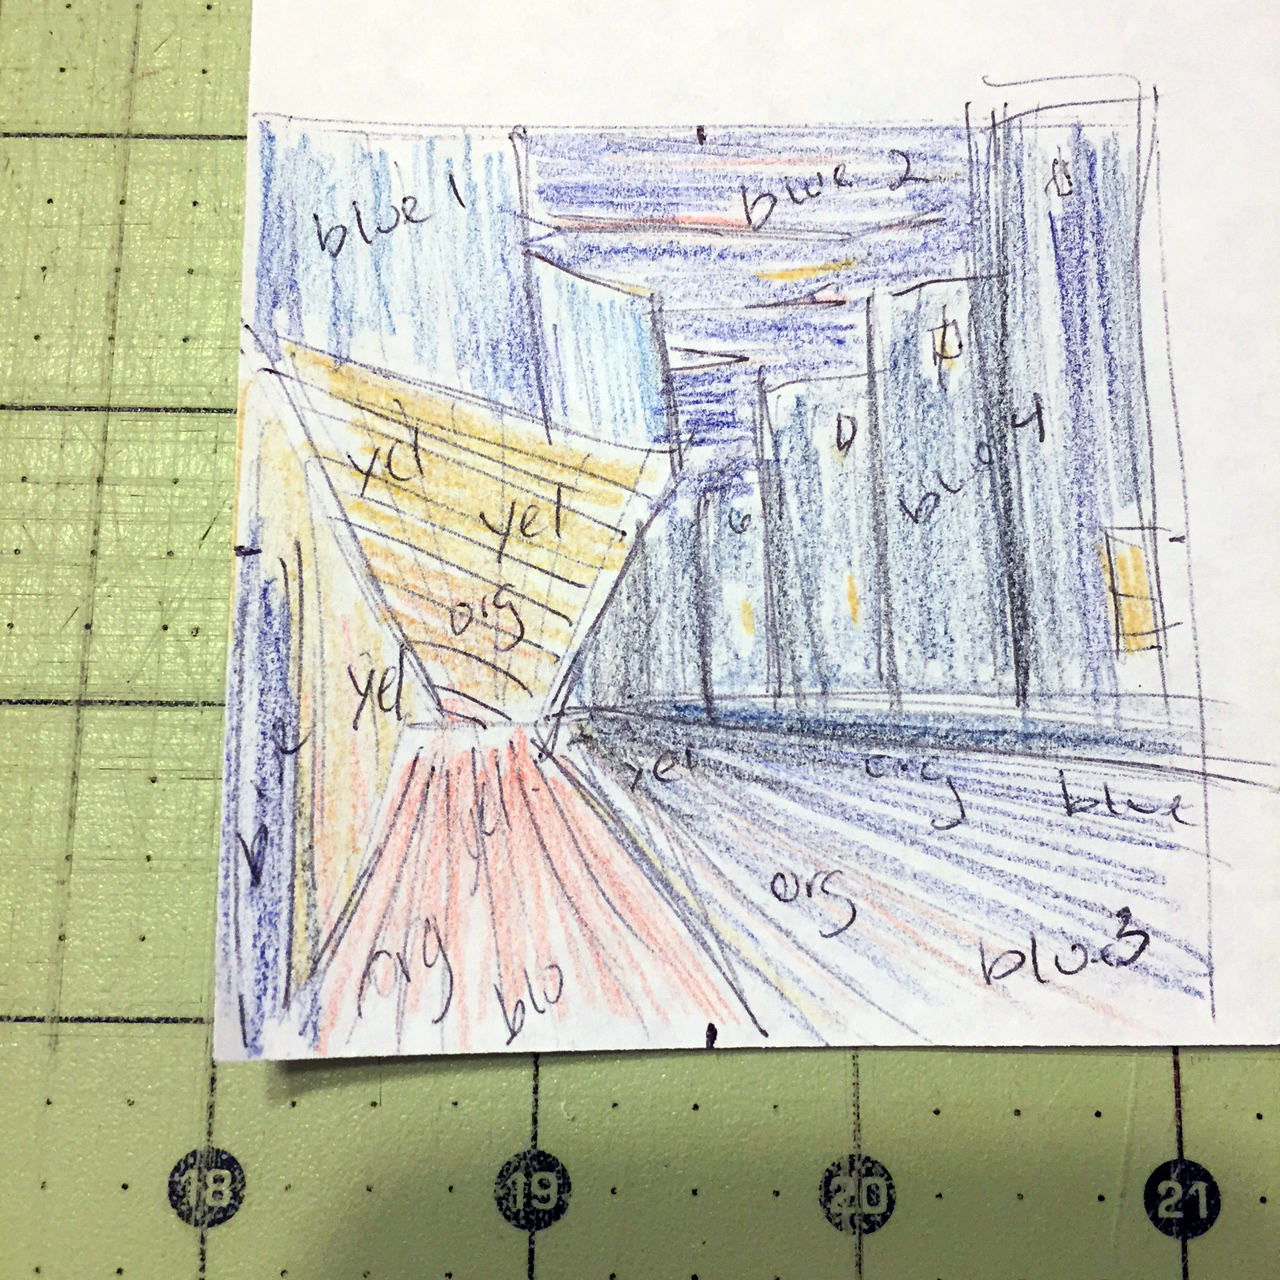
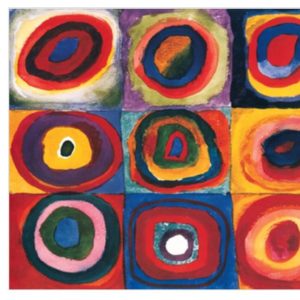
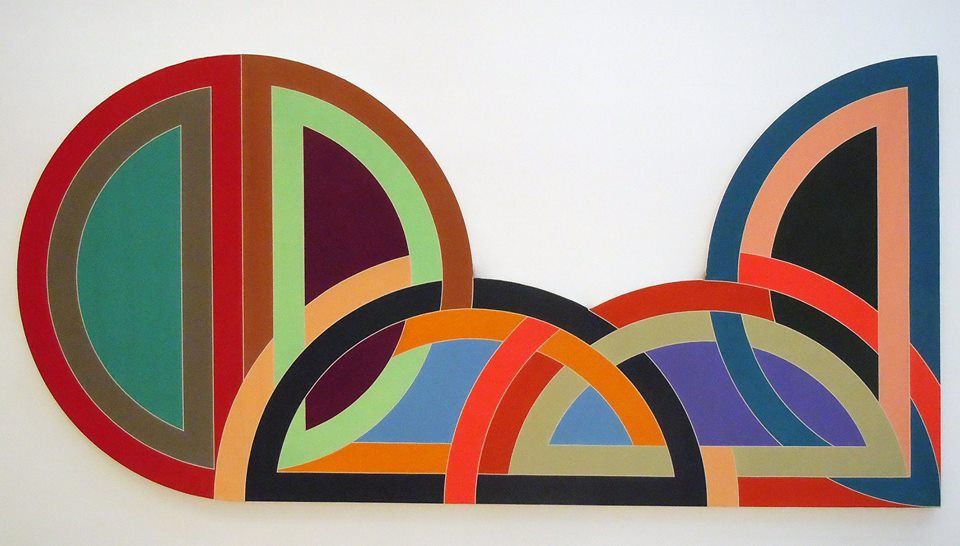
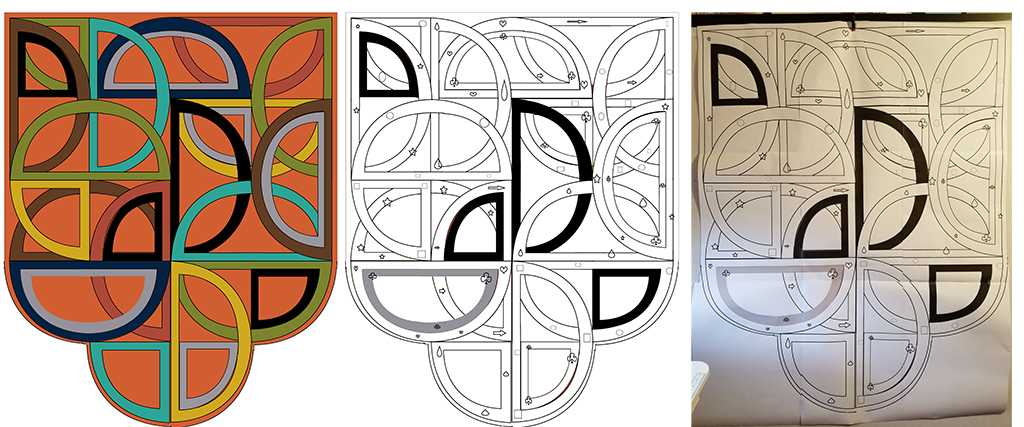
Ever have one of those quilts you are super proud of? That when it’s complete you know it will be magical? And for no real reason, it takes you four years to finish? This is the state of my Vangogh Galaxy quilt!

This is the Technicolor Galaxy pattern by PileOFabric.  I signed up to do this amazing skill builder block of the month in December of 2014 as it was slated to begin in January 2015. Three friends in my guild all signed up to complete this quilt.  By the way – I am the second to finish!  Don’t take that to mean it as a difficult quilt but it is definitely challenging and life got in the way.  Alyssa of PileO’Fabric has incredible resources for this quilt.  Downloadable pdfs, video tutorials, and a Facebook group.

You start off with a coloring sheet to design your quilt.  Her original design for the quilt is a color wheel.  Rarely do I follow other color choices and decided that the color wheel was too traditional.   I was inspired by Vangogh’s Starry Night and chose that iconic painting as my color palette. My daughter also decided to color with me.  I actually really like her purple and orange version! But I know I will never make this quilt again.  It is definitely an accomplishment, but not a repeat!


For this quilt, you start in the center and work outwards.  The center starts with bias strip applique.  The first time I had ever attempted bias tape and it is the first technique in the quilt! Starting with this center, you then build out on the rings and finally patchwork corners.  Each month has their own instructions, video tutorials and templates.  I purchased the templates from her, to make it easier on me and  I am very glad I did, some of the templates are huge!

I would say I was pretty current with the months until month 3.  Ok, I know that’s not too far – but you know, this is such a big quilt technique wise! The sun points radiating out from the center were my favorite to do.  As very simple paper piecing, they were fast to make.  Once we moved into the rings, the small patchwork kept taking longer and longer to do.  I like to sew and quilt fast which was one reason it was put away for so long.  In her design, you do this quilt as a Quilt-As-You-Go project.  I did that once with my guild for a project and will never do it again.  Definitely not my type of quilting! I knew this beauty needed to be on the longarm.

In 2017 I added the project to my American Patchwork & Quilting UFO list.  I did get it out that year, but only worked on one set of curve blocks.  Again I realized how time consuming it was, so back in its box it went.  For 2018 I felt like the time was ready.  The quilt rolled over on my UFO list, and then preempted about six months of UFO choices.  I finished the Gravity BOM in 2017 which was a big finish so I was determined to complete this one in 2018.  Other UFO’s would be pulled from the group list, but I kept working on my #1 – my Technicolor Galaxy. Which oddly enough it’s number was called in December, the month I finished it.

I finished the quilt top in November 2018.  My goal was December 7th for the full quilt to be complete.  I knew it would turn out amazing and after four years it better!  I planned to enter it into a few quilt shows so needed that extra time to quilt before the deadline. My Thanksgiving tradition is to quilt one of my own quilts, and a big one!  I was able to finish many client quilts beforehand for this beauty to receive it’s own week of quilting.  This is the first quilt I truly feel I “Quilted to Death.”  I knew I wanted to fill every little inch of this baby. I double batted this quilt with Quilters Dream cotton and a layer of wool.

It’s not perfectly quilted, and before you say in your head it is – No, it isn’t.  My quilting bumped onto the bias strips a few times and  I remember quite clearly when it happened.  I stared at it for a good minute trying to decide if I was going to rip it out or not, thinking really hard what that little bump would mean.  I knew I was entering this quilt into quilt shows and that little bump took away the option of “Best in Show” but that didn’t mean it wouldn’t be accepted.  Really, all I want are for my quilts to hang and be seen.  Ribbons are amazing – I earned my first three in 2018, but they are not the point of quilting for me.  After staring at that little bump I just kept on quilting.  I bumped three times which from a glance, you can’t see but a quilt judge would notice on close inspection.  Time will tell what happens to this quilt. I for one, am incredibly proud of it’s final state.  A four year UFO, finished with determination and a new set of sewing techniques and quilting skills earned.


Quilt Stats:

Size: 62″ x 62″

Thread Changes: 4

Quilting Hours: 21~

Binding Hours: 2

Length of completion: 4 Years

Shown: World Quilt Florida January 2019, AQS Quilt Week Spring Paducah April 2019.

2018 – UFO Finishes

As a quilter, as many of you are, I love to buy fabric, patterns and design and see all the amazing possibilities there are to create! But finishing them is another story.  I found the American Patchwork & Quilting UFO challenge a few years ago and it is a great way to stay on task.  There program is a lot of fun and really community building. You create a list of 12 and each month they randomly pick a number for you to work on.  There is a huge Facebook group to post your progress and cheer on your fellow quilters.

For those who are not familiar with this quilt terminology, a UFO is an Unfinished Object.  I wrote my list of 12 UFOs in 2017 and completed 4 that year.  A nice start, which led to some rollovers for the following year.  This year I completed 5 off my list!  See that? GROWTH! Let’s take a look:

Kandinsky Quilt

Origination: Fabric & Idea since 2014. Completed January 2018.


When I first started falling in love with quilting, I had eyes bigger than my skills.  I would buy fabrics, patterns, and kits that I would dream of making.  A semi-problem that has continued through my life, even though skills have definitely improved!  For this project, I wanted to learn how to sew circles.  You don’t see them very much.  But I didn’t want to do inset circles, I wanted to make reverse applique of circles.

During a cleaning session I found my little fabric pack I found of 4″ squares.  The fabric is Fossil Fern which I loved at the time and was perfect for my idea.  For a while the little pack of 112 squares went into my stash, hidden for a few years.  I wanted to create a version of the abstract artist Kandinsky and his color studies. This print of his is hanging in my entry hall and always thought it would be a good quilt.  This was the year!

I decided since it’s a mini and just for me, I would take the easy way out and do raw edge applique.  Organizing the fabrics, I stacked the lights on the bottom, added the next medium layer.  I sewed a small circle on the two layers and then cut out the inner circle.  I repeated the process for the next layer, and then pieced into a top.  Since the aspect was about the color and circles, it did not need a lot of quilting.  Simple quilt in the ditch was enough and I had my first UFO complete! The circles are not perfect, the raw edge a little tight, but I love it just the same.


SEW – Alphabet Soup

Origination: Letter S since summer 2017. Completed: May 2018

I’m not sure when I first found JayBird Quilts patterns, but they are my favorite!  She created two amazing rulers and a plethora of patterns to use them with.  I have so many of her patterns I keep a list on the ‘notes’ section of my phone.  If I spot a pattern of hers in the wild I can quickly check my stock to see if I have it.  This has saved me in double purchasing patterns I love!  I have 55+of her patterns which include the minis, the standard patterns, and her blocks of the month.  In 2017 it is time to start actually making them!  Since then I have now made 12 of her patterns. See that, more GROWTH!


The letter S was made for a class sample. I taught this technique at Happy Apple Quilts.  I love text fabric and when she created an alphabet pattern, I knew I would be hooked.  There are lots of little pieces and you need to use both of her rulers to create them.  The Hex N More and the Super Sidekick. The letters can have really great effects depending on the fabric you use.  For this one, I decided to use Carolyn Friedlander’s fabric of neutrals.  I knew the patterns would blur as one.  This now hangs in my sewing room. I am hoping she creates a miniature version!


Creamsicle

Origination: March 2017, class at Lakeland Original Sewing & Quilt Expo  Completed: June 2018

We are very lucky here in Tampa to have access to lots of great quilt shows.  The Original Sewing & Quilt Expo comes every year in March nearby to Lakeland, Florida.  It’s a tradition of my mom’s and mine to go every year.  My guild even has a table and quilt show with them for the past 3 years!  This design came from a class there.  You start with a layer cake, create some triangles, and do a lot of chopping and rearranging.  Not difficult at all, and in class I had finished a few blocks.  But like most quilters, I became distracted and this beauty was put in a box.  I just loved the fabric and decided this year it needed finishing.  Fabric is by V & Co, her Simply Colorful line.  Orange is my favorite color.  It is so bright and cheery, and is well underutilized!

Snack Time

Origination: 2016, maybe? Completed: July 2018

Time for another Jaybird Quilts pattern! This Snack Time pattern works from a jelly roll and the crib size uses half a roll.  I didn’t want to make a huge quilt and I thought instead I could make two quilts from one jelly roll, and then donate these to my local Project Linus.  One reason I love JayBird Quilt patterns is they are super fast to make.  The Snack Time pattern took a little longer, due to lots of cutting and forming the ‘donuts.’  For a while it was my project I took to guild sew days which is really why it took so long to create.  I split the jelly roll into two color ways and chose different background fabrics. I really love how it made it look like two completely different quilts this way!


My final finish for 2018 was a major project, my Technicolor Galaxy quilt. This beauty deserves it’s own post.

I have my 2019 list created, with 6 rollovers and 6 new projects.  Here’s hoping to more growth next year!


FreeSpirit Block Party book will be debuted at Quilt Market!

Our FreeSpirit Block Party InstaBee is up and running!

We have 6 hives buzzing, across the world! Quilters from the United States, Canada, Denmark, France, and Australia are participating.  Follow the #FSBlockPartyBee hashtag to see some amazing blocks being created and shared.  Did you miss the news about our FreeSpirit Block Party InstaBee?  Learn more HERE.


Most quilters will have heard of International Quilt Festival that occurs in Houston each year.  It is an amazing quilt show and one of the best in the country.  But do you know the week prior to Quilt Festival, is Quilt Market?  Quilt Market is when the quilt industry meets and shares everything about our favorite world.  Fabric companies, ruler makers (as in quilting rulers – not royalty, although we think some of them are!), designers, quilters, shop owners, and more come to Houston to learn what is happening in the industry.

The first day of Quilt Market is School House.  It is the premiere day, where companies debut new collections, tools, designers, patterns, and more.  School House opens with a major manufacturer presentations and then every 30 minutes there are up to 10 different mini presentations

you can attend and learn something new.  Including, our FreeSpirit Block Party book debut!  For those that follow Scott Fortunoff, he listed the school house sessions for all the Jaftex companies which now wonderfully includes FreeSpirit.  And our book is on the docket! Very exciting.  There is also a time block that is unannounced.  FreeSpirit is up to something! I wonder what it can be . .

Ok, so here is my big idea:

I had this in the car line, when I was flipping through my copy.  I had to do some planning and configuring to make sure I could pull this off before I announced it.  I am going to Houston Quilt Market and am going to have as many FreeSpirit designers that created a block for the book sign it! I have a list of 6 designers that will be present at market. Tula Pink, Anna Maria Horner, and more.  FreeSpirit was even so kind to send me a second copy to do this.

So you may be thinking: “So cool! I wish I could have a book with all my favorite designer’s autographs.”  Well guess what, you just might.  Notice above the word “second book.” Part of my big idea was Step 1: Get designer autographs in the book.  Step 2: Auction the book off on Instagram and give the funds to Project Night Night.  Pretty sweet right? You have a chance to win a copy of this book autographed and the proceeds are donated to a great charity!  Win Win!

Now our auction for the autographs will be open to anyone on Instagram.  I will have some of my new FreeSpirit Instagram friends share this as well so it reaches as many people as we can and in turn earn as much money for Project Night Night as it can.  I will post the book for auction when I return from Quilt Market and Quilt Festival. Auction will go live on Friday, November 9th and it will close on Sunday, November 11th at 7pm EST.

I’ll be taking photos at Market with the designers as they sign the book. And yes, I will be having them sign my copy – why wouldn’t I??

So, what do you think of my big idea? Who do you want me to see first?

Arch – Creating the Curve

This quilt design all stemmed from a scrolling session on Facebook. I follow Quilt Fest – Mancuso and found in my feed they had a new quilt design competition for two of their upcoming quilt shows. Mid-Century Mod Modern competition at the Pennsylvania National Quilt Extravaganza and the Pacific International Quilt Festival in California. My first thought was that name seems a little repetitive. But hey, a modern quilt competition that is not put on by the national MQG is rare. So I took a look.

Mid-Century Mod emphasizes the look and feel of mid-20th century design. Artists are asked to draw inspiration from this period, reflecting their own exposures or from the work of artists such as Joan Miro, Piet Mondrian, Victor Vasarely, Frank Stella, etc. Where did you find the inspiration for your Mid-Century Mod quilt?

Their description sounded interesting so I used my favorite reseach tool Pinterest to look up some information on their selected artists. Instantly I was in love with the work by Frank Stella.  Curves galore!


Using his piece as a starting point, I turned to my good friend Pinterest again to help choose the color scheme.  I wanted a color scheme true to the time period that would show a good range of values.

First Up – Designing the Quilt

As a trained computer graphic artist, I decided to use Photoshop to design the quilt.  I was able to create a vector shape of the half circle and quickly change colors and duplicate.  Layering the shapes around is fun and added in a few quarter arches to break up the pieces.  I liked the double layering of arches to have multiple sizes as well.  Looking back at Frank Stella’s work, I wanted to create an overlap but not the exact same idea.  I liked his use of multiple different colors in the background but for me, orange is the way to go.  It’s my favorite color to use in a quilt and would work perfect as the backing here.  The color itself was a mid-range in the values so all the other curves would work off it.  When I first saw Frank Stella’s pieces, instantly I knew I wanted the bottom of the quilt to incorporate the arch.  Keeping it a square would not do with these pieces and made for an interesting design challenge.

Once I had the layout for the quilt, I created a black and white version with a color code system, so I wouldn’t waste a lot of ink in creating my layout.  I was going to print on regular size paper first, but ended up sending the images to Office Depot to be printed on architecture paper sheets. It was much easier to work actual size and tape them together.  Then I used a light box to draw the shapes onto fabric, to create the arches.

And then the very important questions, how do you actually sew it?

It’s not a drunkards path. The angles are different and all of the overlapping would require tons of planning to do it. I thought of the Sharon Schamber Piece-lique method of sewing curves.  It could work, but again tons of planning and I didn’t necessarily have all that time before the first deadline.  I decided to make it with applique. It was the simplest method to get my effect, but I would soon realize not as simple as I thought.

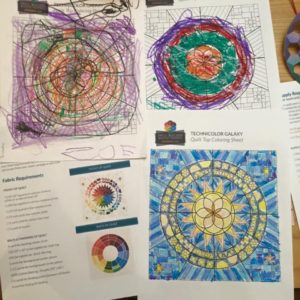
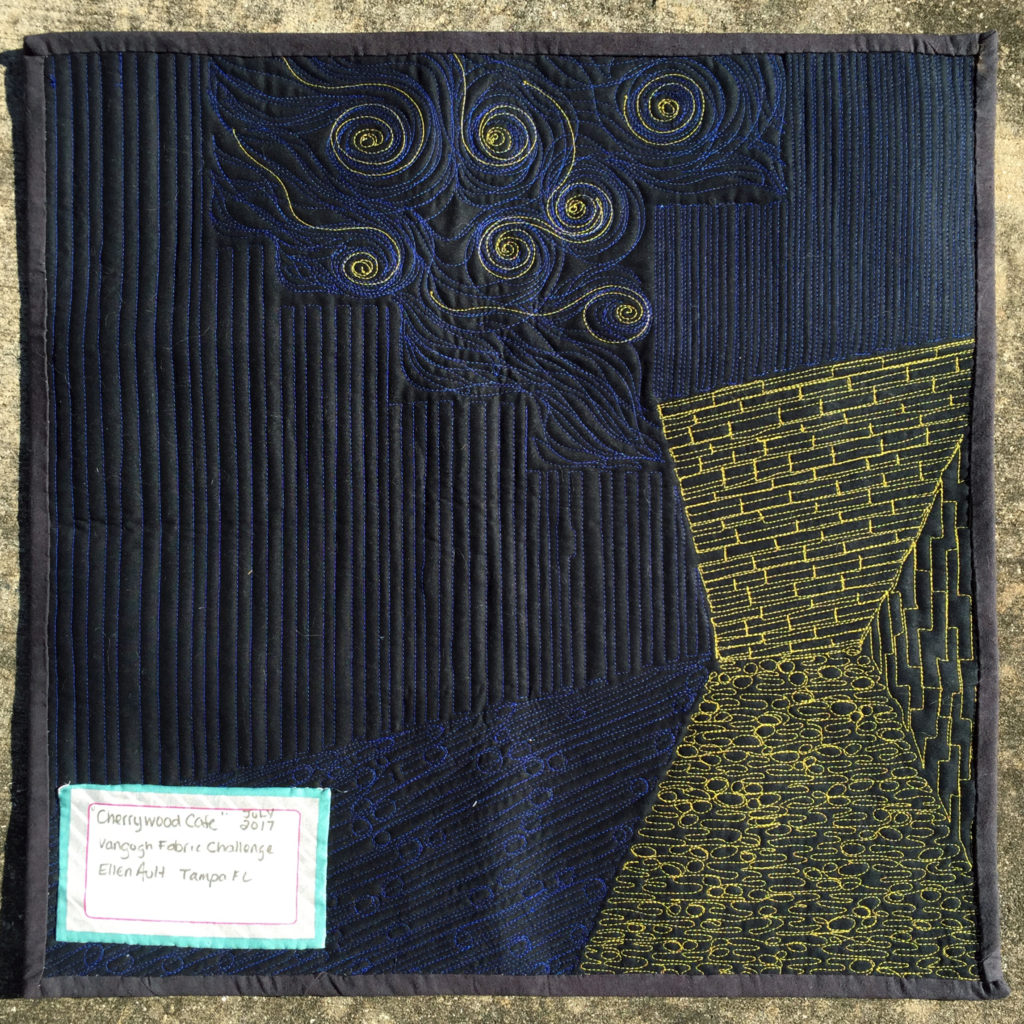
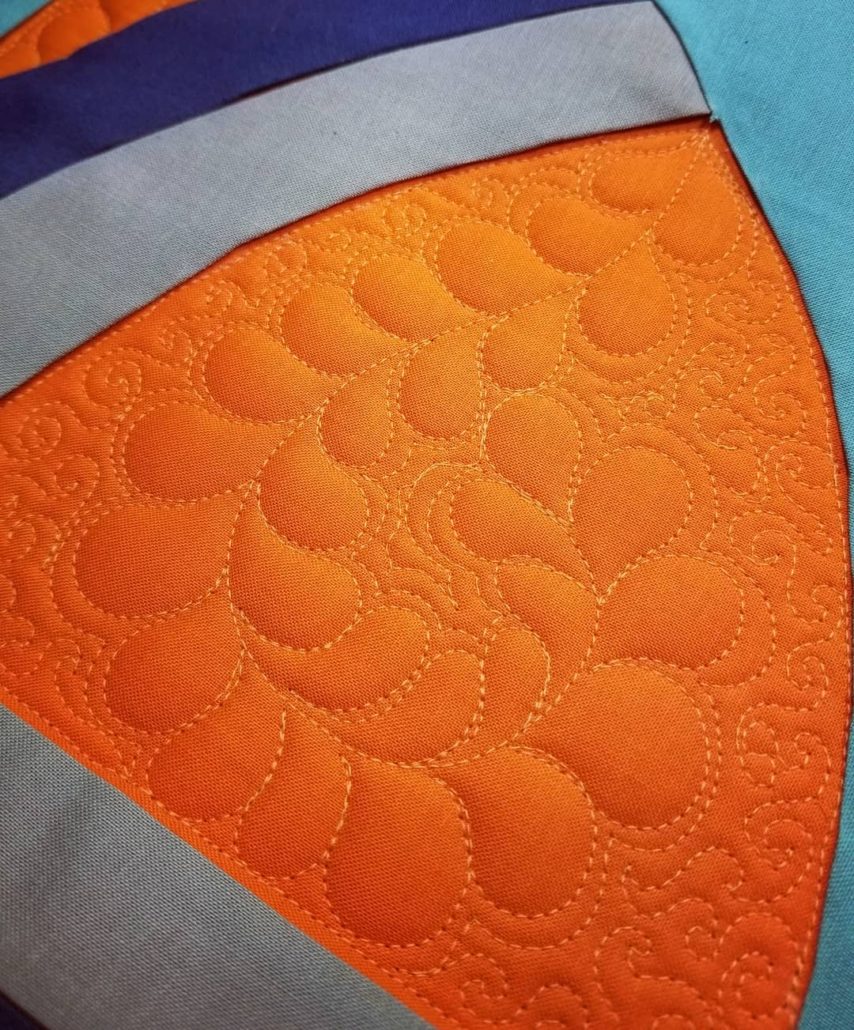
This wasn’t hard to create, but I definitely had to pay attention in what I was doing.  I was dealing with bias edges so careful to not overstretch.  Like needle turned applique, I ironed each side of the arches to create a nice edge.  I was contemplating sewing the pieces down on the orange first, with my domestic machine.   I wanted the edges to puff when quilting so each arch was glue basted until the quilting stage. That was a mistake.  I had a double batting for my great texture, but it was very difficult to keep the lines clean as I quilted them. It puffed just like I wanted it to, but the stitching was uneven. Lesson learned for next time!

Sending it off to the contest I could see the flaws.  I know you are not supposed to point out what’s wrong in a quilt, but I knew it was a Blue Ribbon winner. The quilt overall looked exactly the way I had hoped, minus the stitching on the curves.  I still had high hopes for it be accepted, but probably not win anything.  Well, I was wrong! The quilt was accepted and won Best Use of Color for the Mid-Century Mod Modern competition at the Pennsylvania National Quilt Extravaganza! Even the judges mentioned the uneven stitching – lol.  Knowing all the issues I had with this quilt, the stitch technique errors I could see – I was completely surprised to win this!  It goes to show how research can benefit in quilt design.

And to my surprise when the quilt came home, the ribbon was blue.


Gravity Dreams

I have always been a fan of Jaybird Quilts patterns. I will admit I collect them, and have collected more than I make. I just love how her geometric designs fit together!  So when she created the Gravity Quilt block of the month, I knew it would be one I would have to make!  My mom bought me the kit for Christmas one year. And then the kit sat for about two years, in a nice bin, on a shelf.  But then I joined the American Patchwork and Quilting UFO Challenge!  I knew this would be my determination to finally start this quilt!


It’s number was picked in February of 2017 and I had the top finished in June 2017. Pretty happy with that.  And what’s funny, once I started I realized how easy this quilt was! I was accustomed to Julie Herman’s instructions and shapes and rulers, it came together in one month instead of nine! I remember I chose it specifically during an extremely stressful time at work and needed a way to relax when I came home.  Ever make a quilt so large you need your husband and daughter to hold it over the loft balcony to get a picture of it? Yeah, that was a first.  Until my King of Scrap of course, more on that quilt another time.


Sadly Gravity waited another 8 months before I had a chance to quilt it, folded away on another shelf.  It’s definitely on the top of the list for a longarmer’s dream quilt. This February I decided it could work in my guild’s quilt show, so on to the frame it had to go!  So many quilting options available!  I did the entire quilt in free motion and ruler work.  That’s right, ME! No computer involved!

Here are the Quilt Stats:

Size: 97″ x 96″

Thread changes: 19

Background Stitches: 177,906 at 11 stitches per inch

Color Center Stitches: 105,477 at 11 stitches per inch.

Quilting Hours: 17 hours

Binding Hours: 6 hours while waiting at jury duty <- seriously

Hanging: Sew Totally Solid, Tampa Modern Quilters Guild challenge exhibit at the Original Sewing & Quilt Expo in Lakeland, FL. March 2018.

AQS Quilt Week Virginia Beach, Virginia, October 2018. 

Cherrywood Cafe


Have I mentioned how much I love fabric challenges? Cherrywood Fabrics is no different.  This is the third quilt I designed and entered with them, and the second to be chosen! And let’s just pat myself on the back and say my quilt was selected for the French Gallery.  This quilt will see more of the world than I ever will!

When most people think of Vangogh, the typical Starry Night or Sunflowers come to view.  These are amazing of course, I made a cross stitch of Starry Night.  I have a whole other quilt color scheme inspired from Starry Night.  But for this, I wanted to do something that was still great but not ‘the’ Vangogh piece.  I chose the cafe because I love how Vangogh made the night just come to life.  I also thought I could simplify the color scheme and block out the shapes.  I also wanted to do matchstick quilting another try, but on a nice small scale.


I first created a little 3″ sketch.  Then blew that up to a real scale drawing and color blocked it. Which then I started creating improv pieces based on these shapes. It actually came together really fast, and was really happy with it.

I entered and was luckily accepted.  These Cherrywood competitions get bigger and bigger each year! It’s great for them. But equally great, the French Gallery traveled to International Quilt Festival Houston last October. Which happened to be my very first quilt market.  So seeing it hang was awesome!


Not sure how I am going to handle the Prince theme for next year . . .